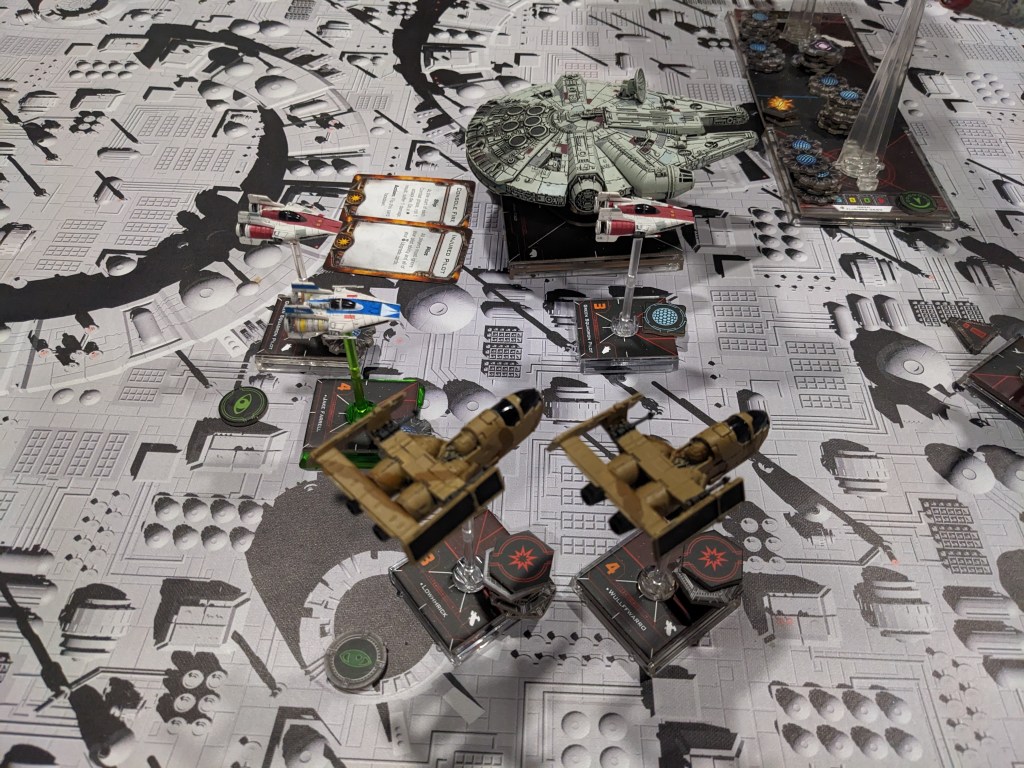
The first test cleared up a ton of issues, but I was so drowned in things going on in life I was not able to get a coherent battle report together before I forgot the little details. Basically, Epic ships were tougher than expected, so I dialed them back and tried again with this one.
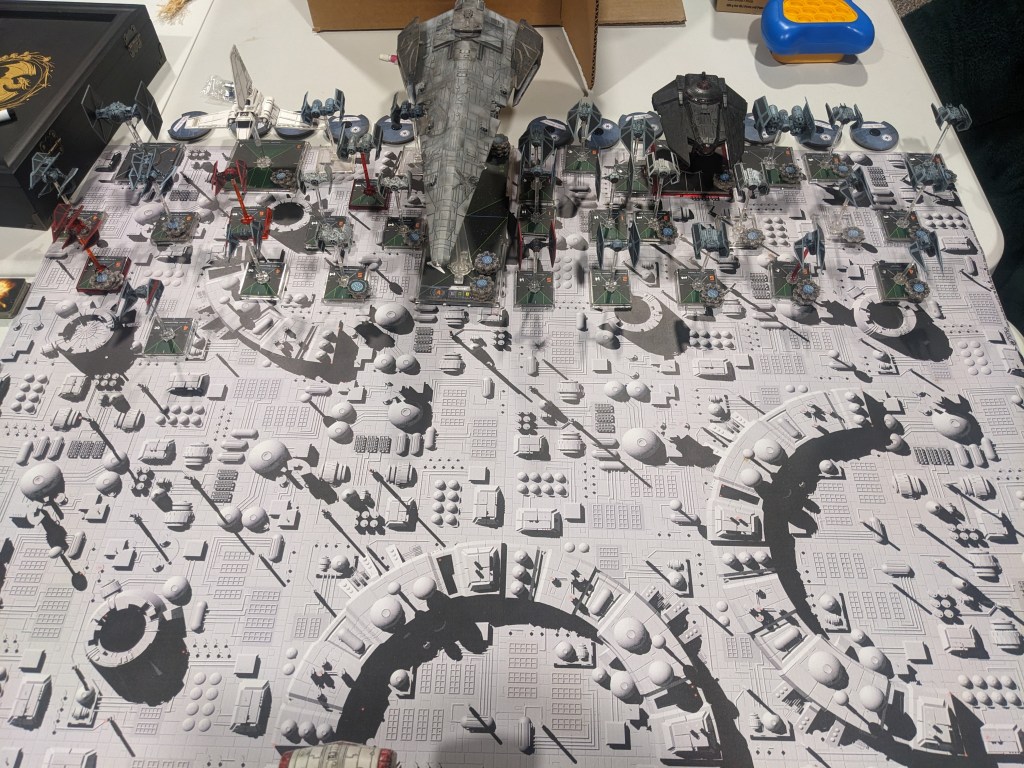
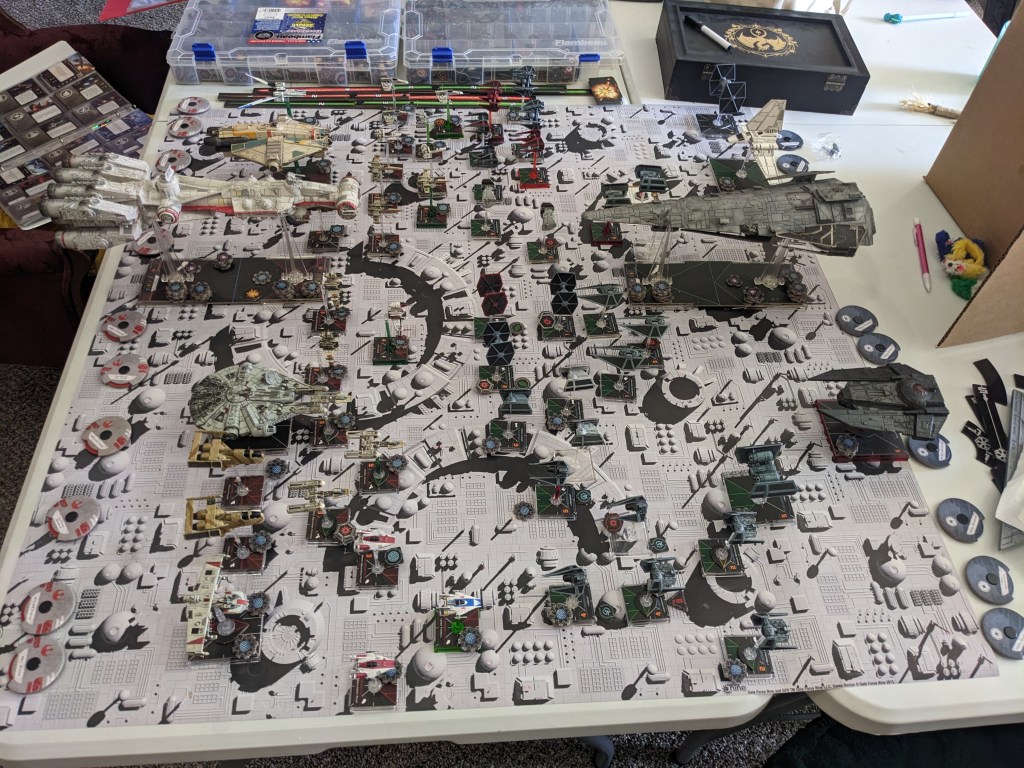
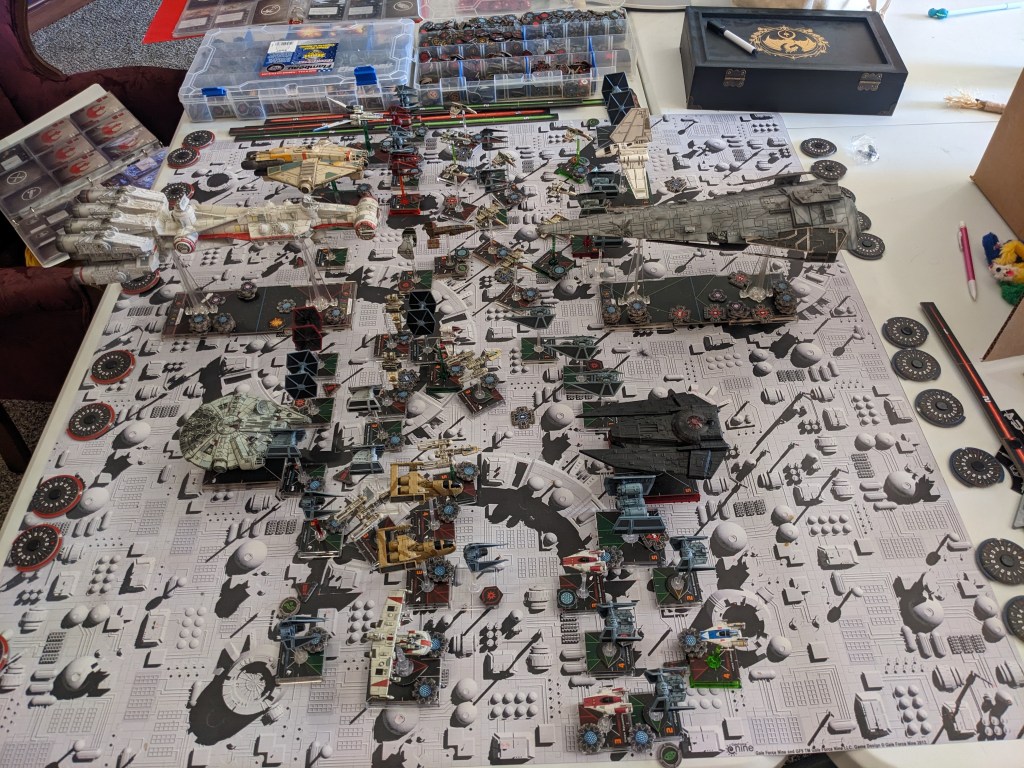
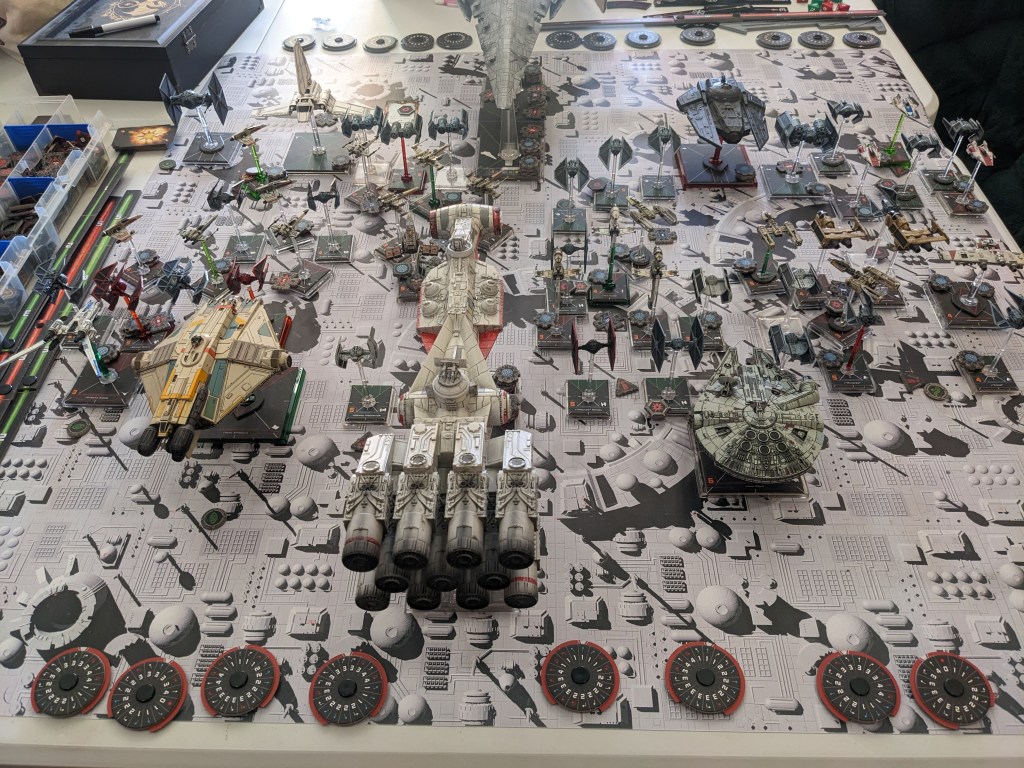
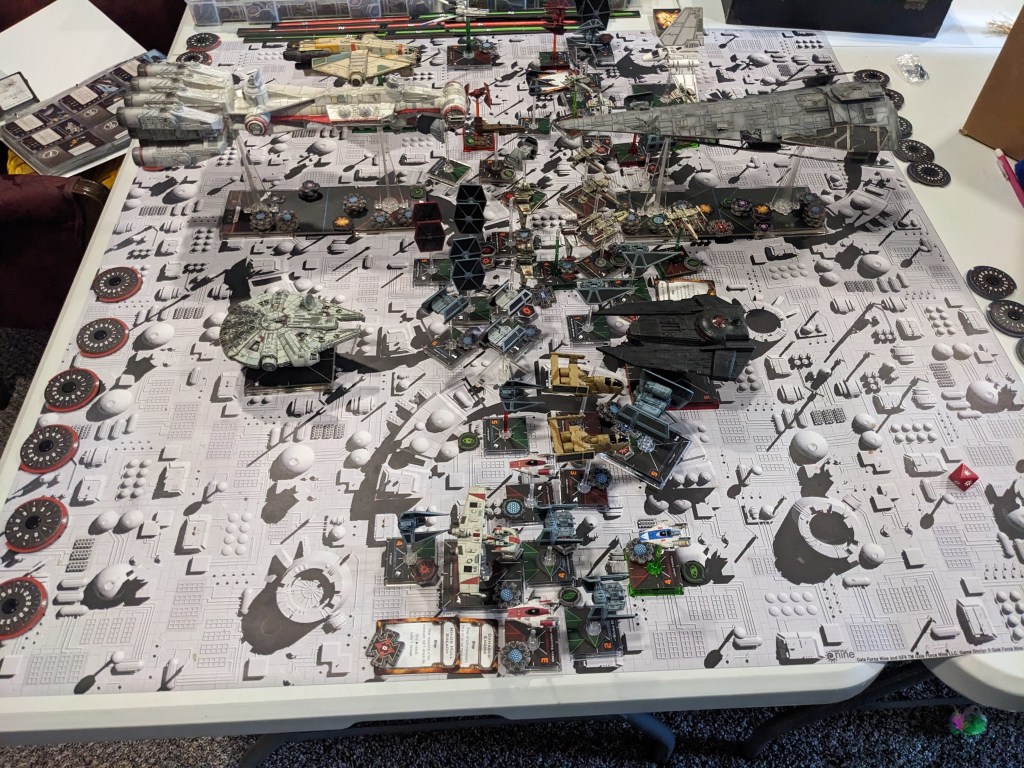
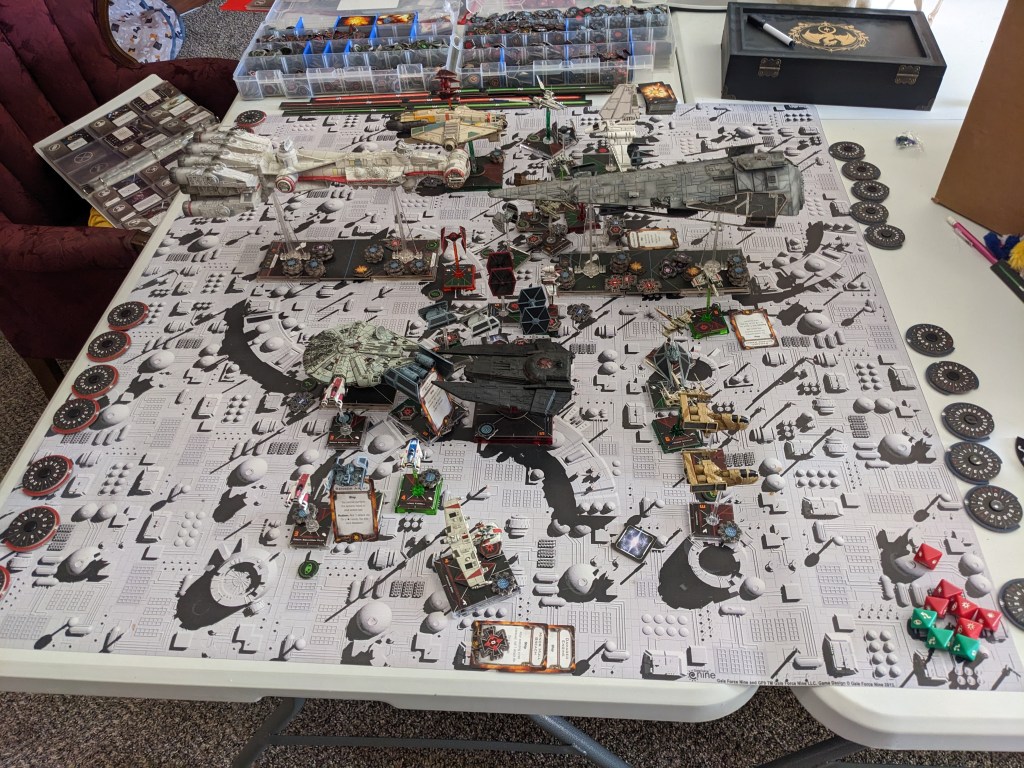
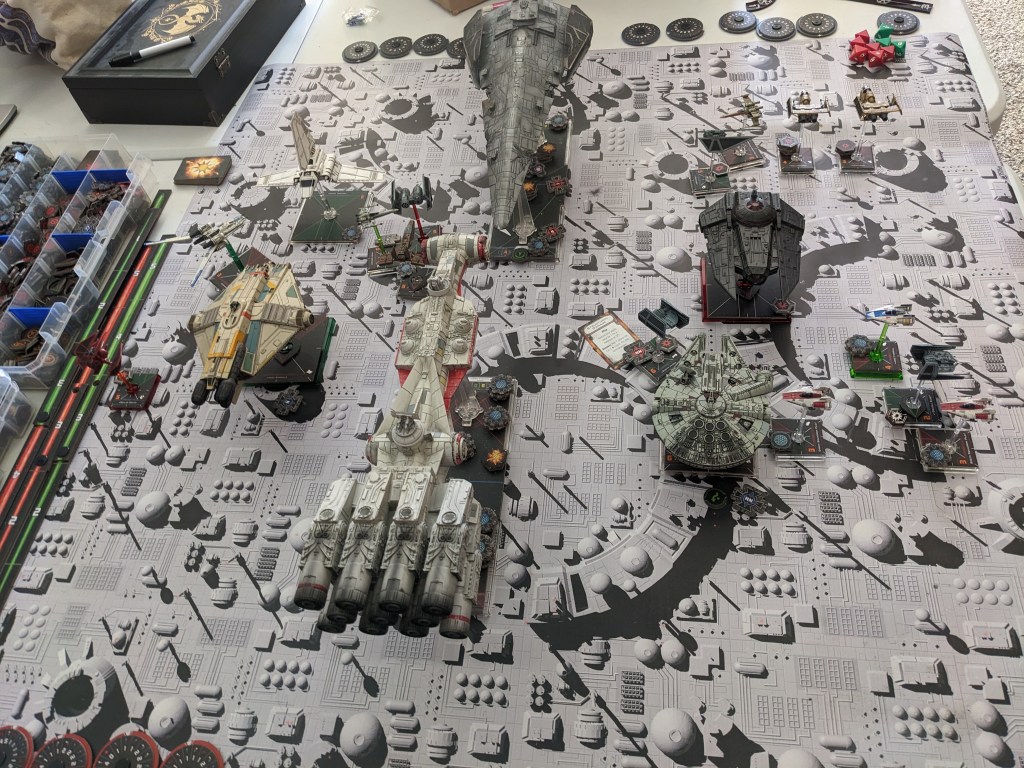
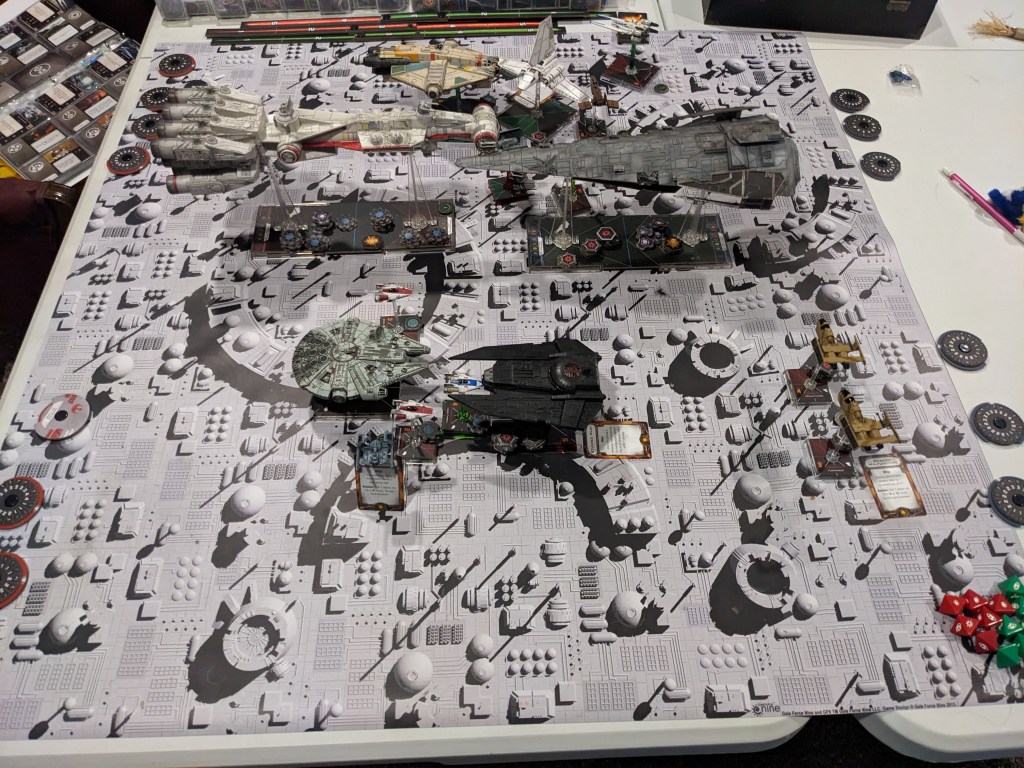
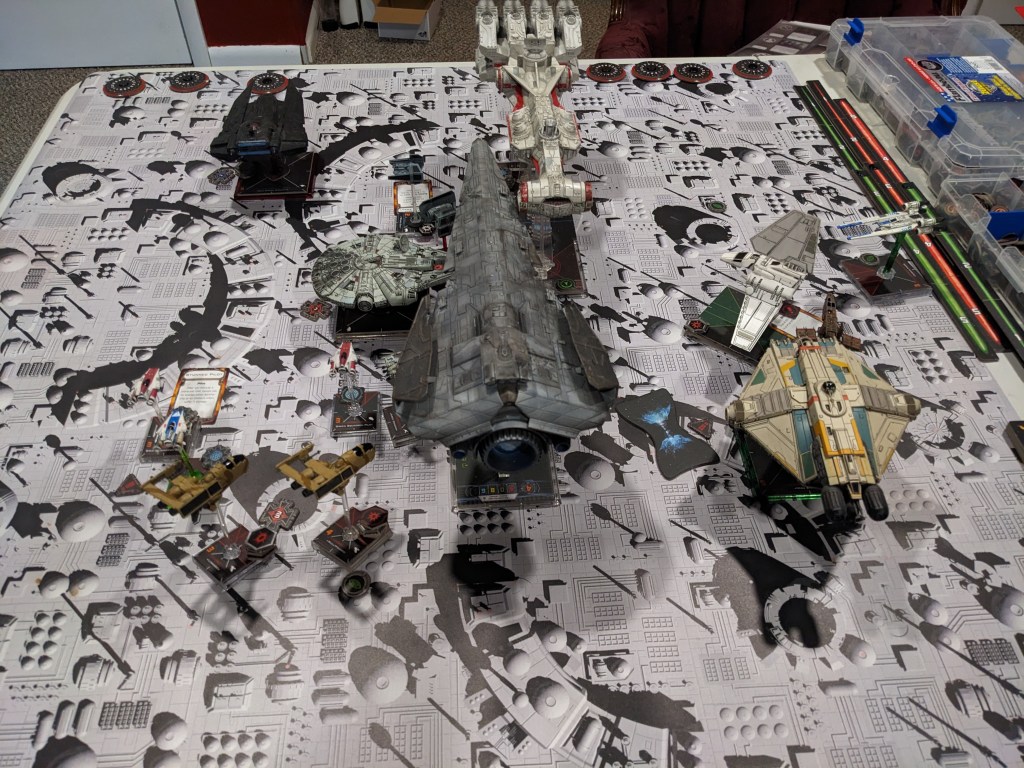
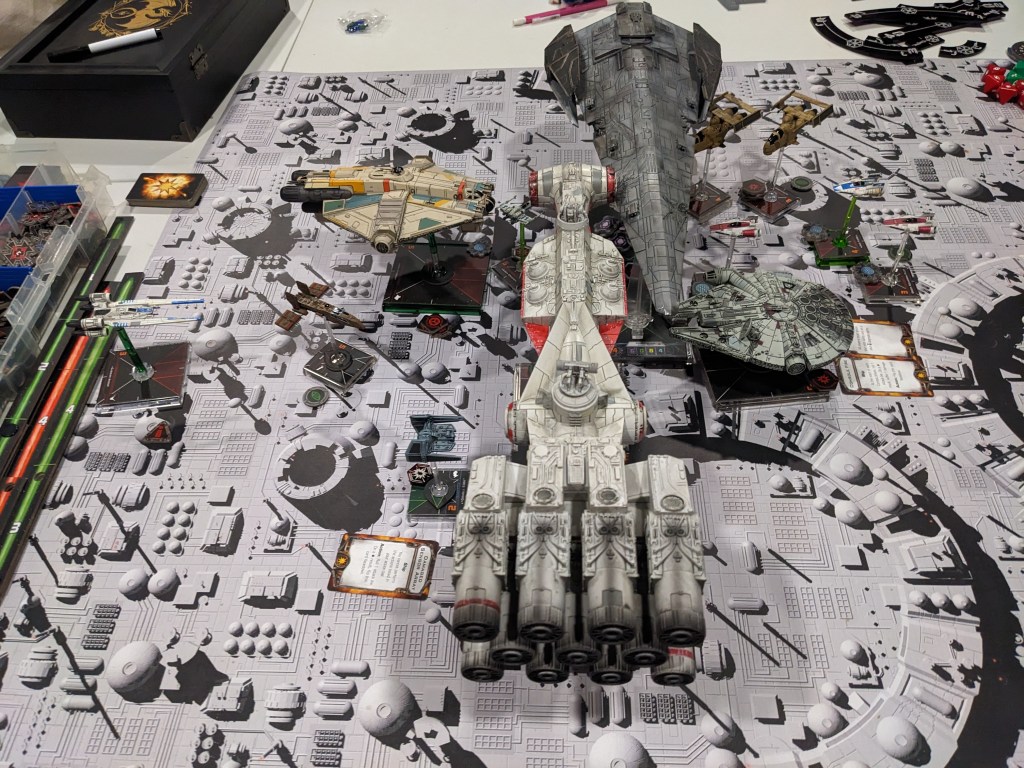
Deployment was INTENTIONALLY crowded. I wanted to test my skills as a coordinator in congested space. Given my eventual goal is for my ENTIRE collection to participate in a giant battle, I will need to be able to avoid traffic jams.
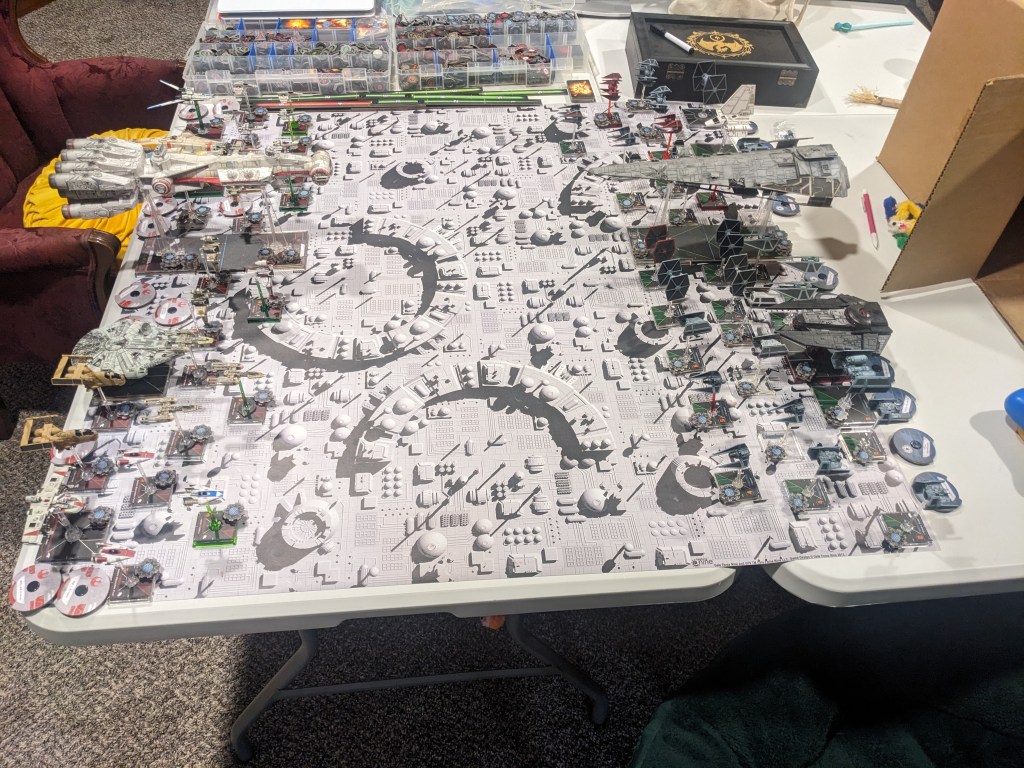
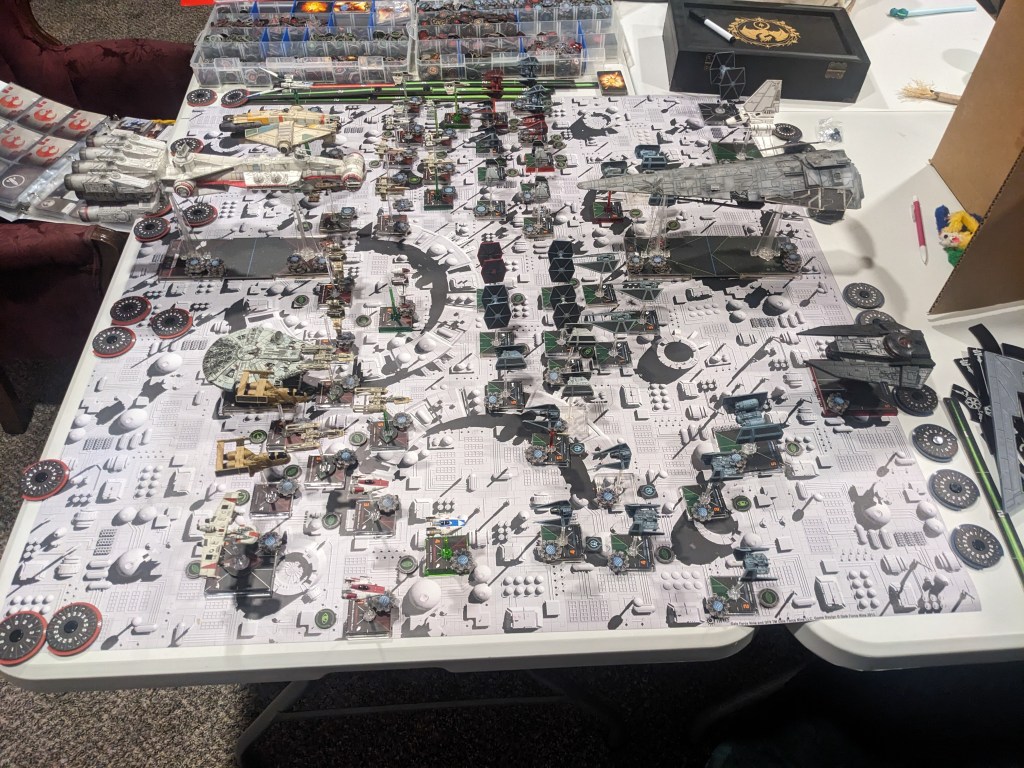
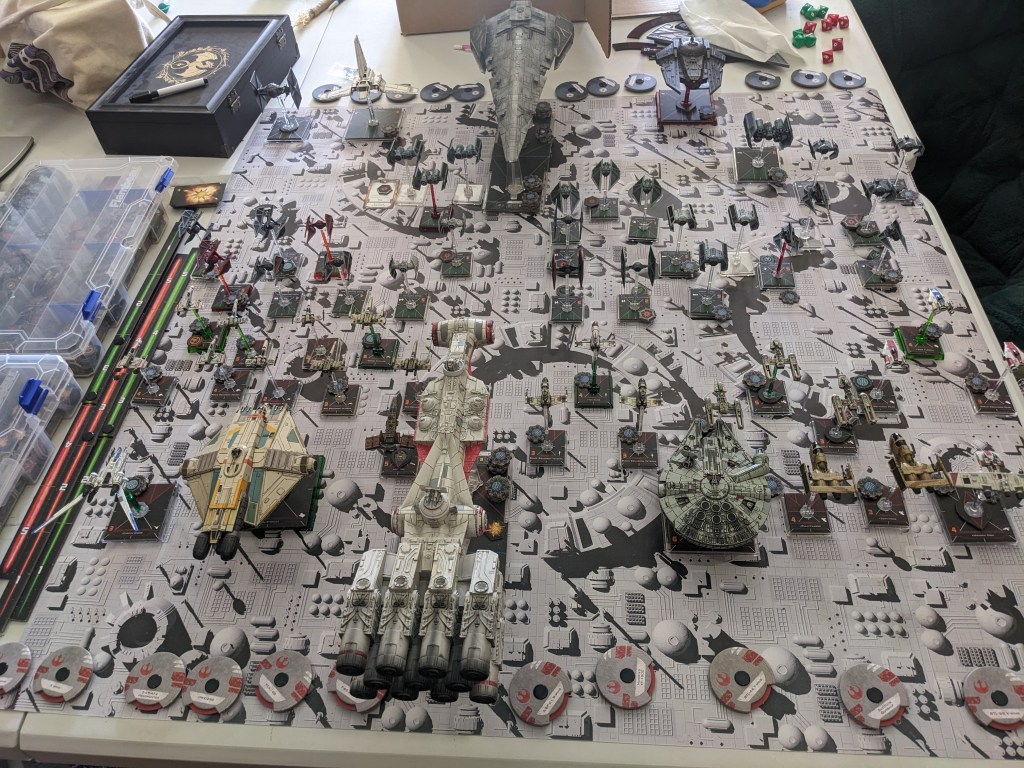
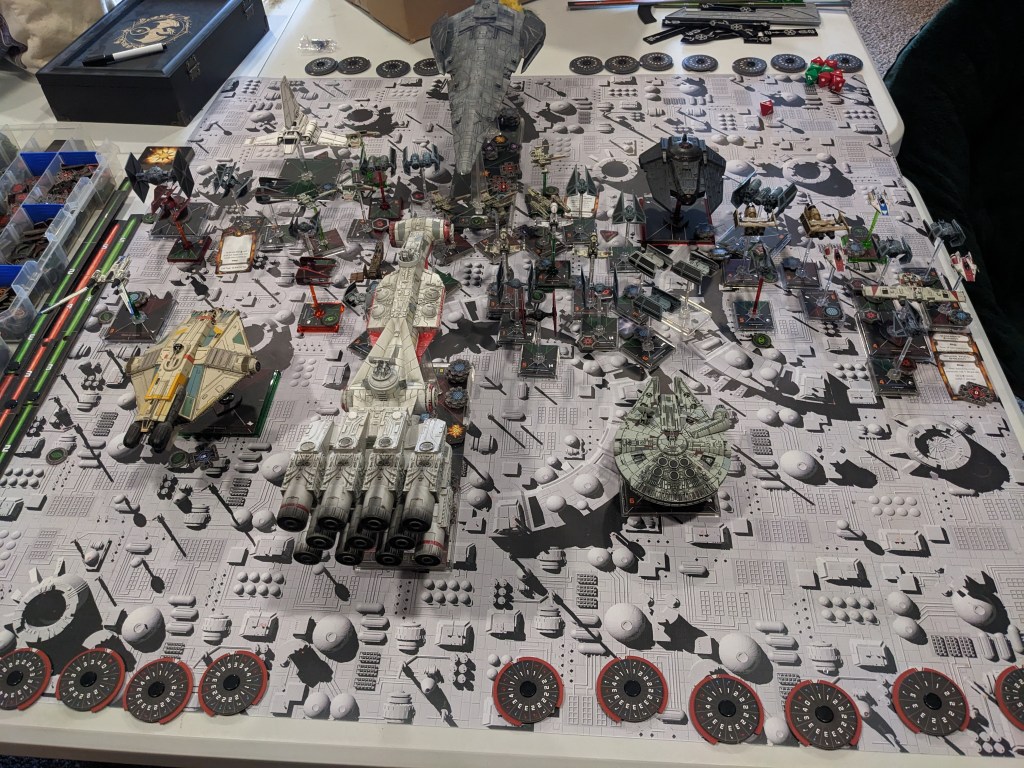
Rebels brought a squadron or single medium+ sized ship for most ship types lead by a unique hero and a CR-90. This ran at 1300 points and some change, perfect for testing Epic ship points designed to run at a 1 to 500 point ratio, with the CR-90 equaling 2 Epic Points. Being congested, I expected to see some massed firing.

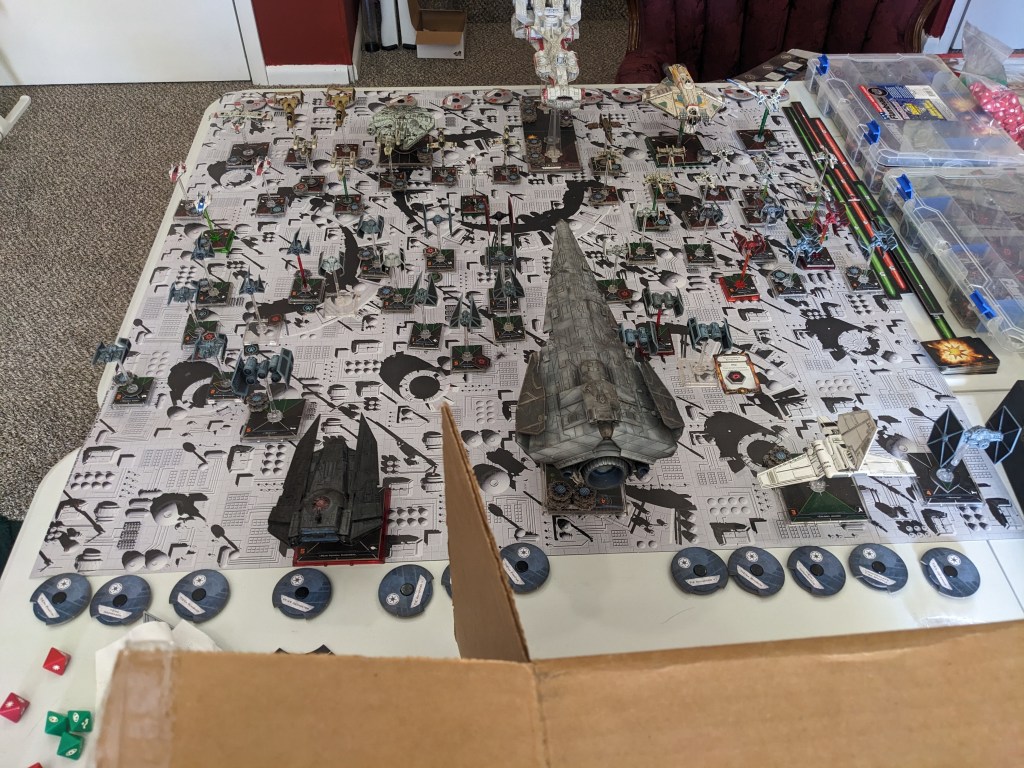
The Empire brought a similar layout, ending up with almost 1600 points and a Raider. I granted the Rebels one full dice roll ignore and two fudges to compensate and just moved on. This test was designed for me to run Epic ship mechanics and traffic control more than anything and the board was packed as it was. Like the CR-90, the Raider is 2 Epic Points.
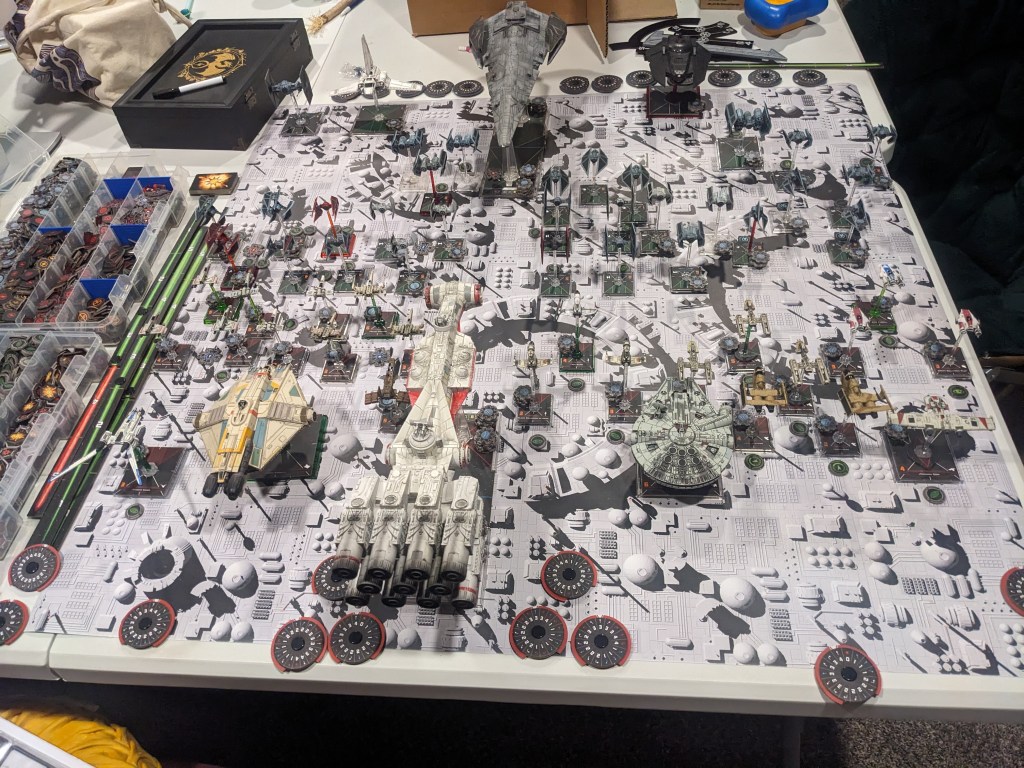
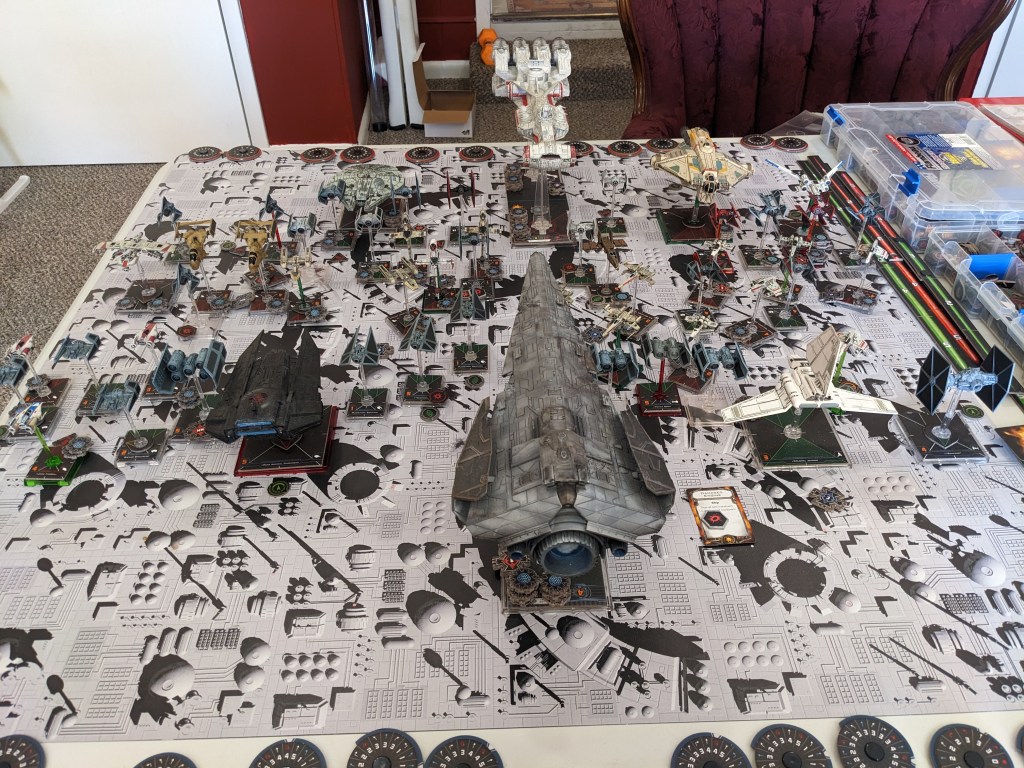
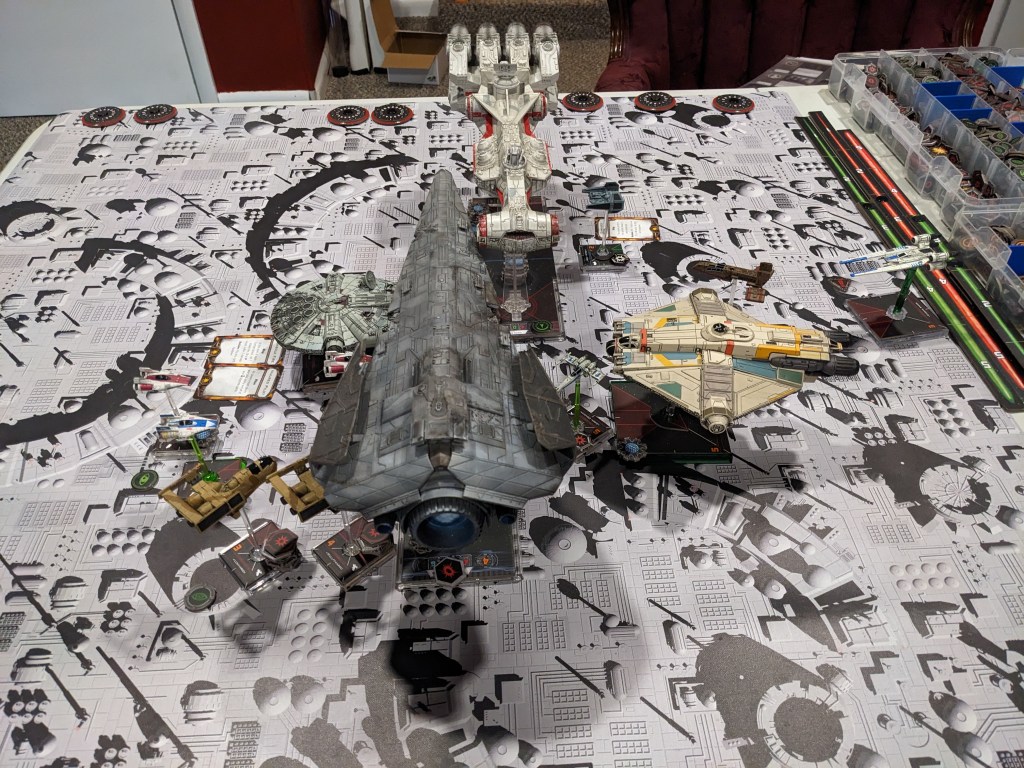
It started off pretty smooth. I had planned the rebel movement quite well, only having Ghost get entangled in friendly ships. There was no way around it. Otherwise they leap frogged around each other quite well. Imperials had several more models, so despite my efforts the Lambada, Brute, and Decimator all got stuck.
Not the end of the world by any means, as I wanted the Imperial fleet to form waves of fire to divide and conquer the rebels. In the system I’m working on, torpedoes, missiles, and bombs can cause super structure damage, crippling the special random abilities of each ship section even if shields remain. The Empire by default doesn’t carry many of these weapons, so they needed to crush the heavy rebel fighters and bombers quickly.
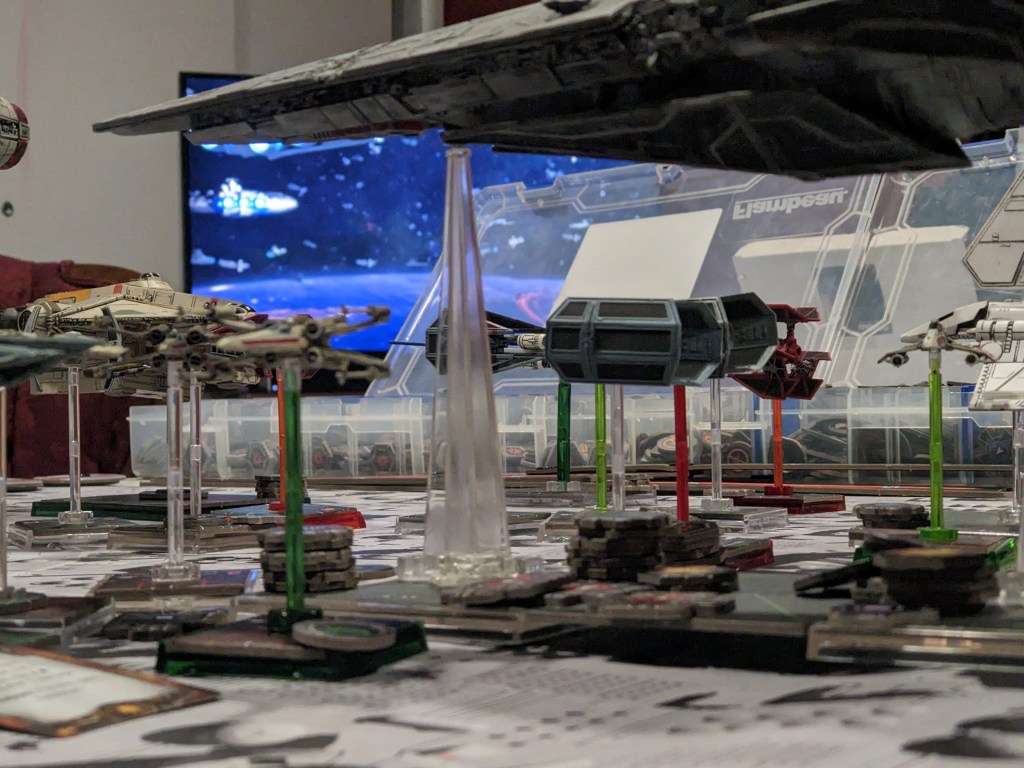
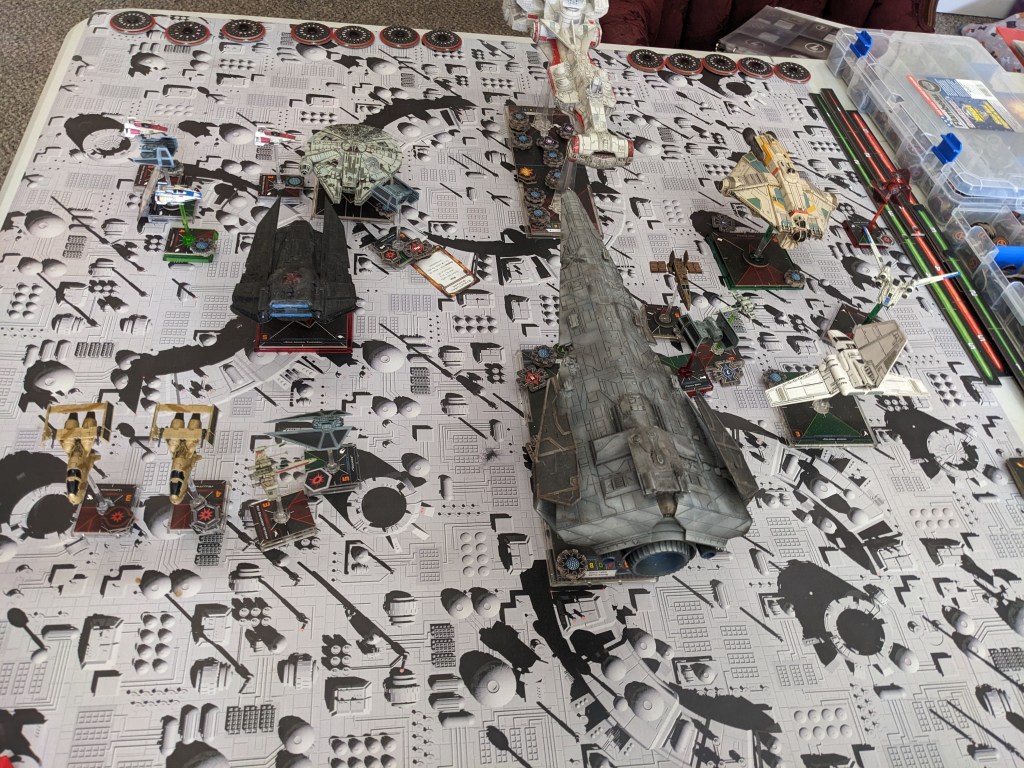
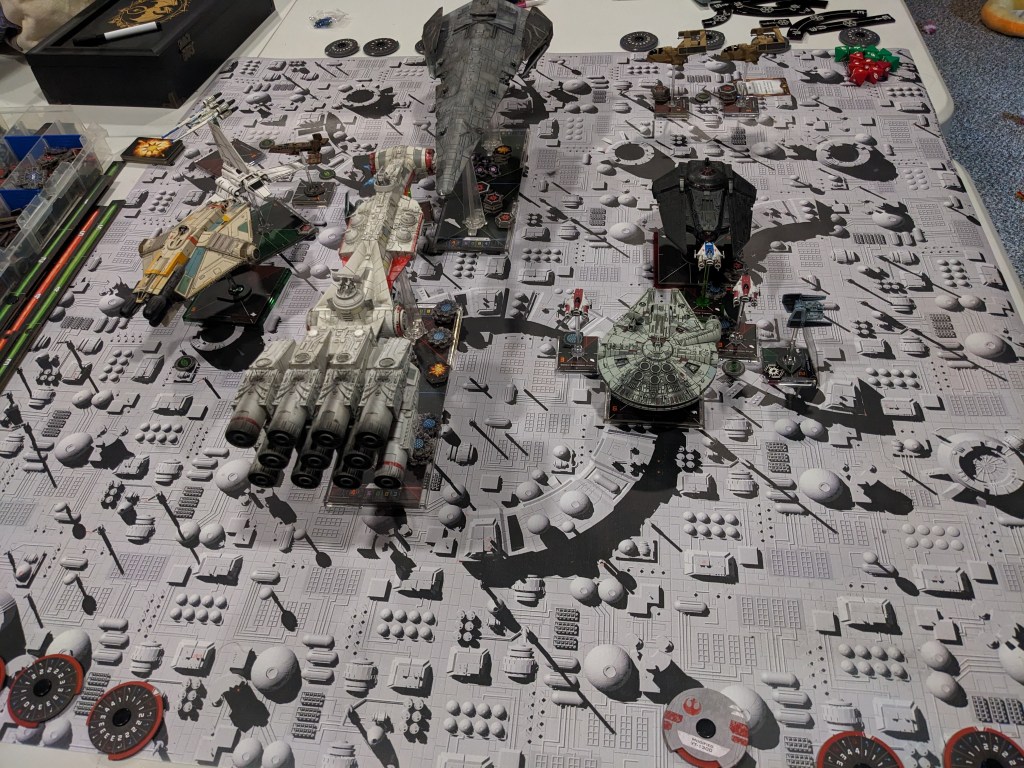
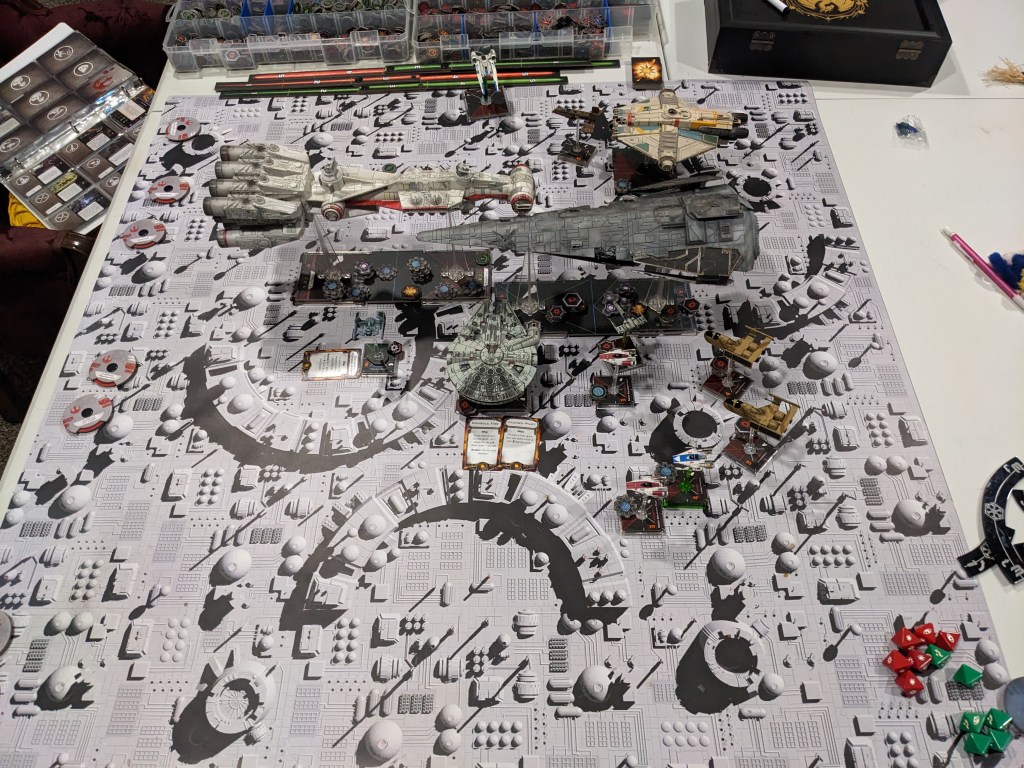
End of movement phase saw the Imperials form a terrifying fighter wall!
Turn 1 ended as usual. Light to moderate shield damage on ships with only a TIE/LN destroyed. The Phantoms stayed cloaked, tanking incoming fire to protect the second wave on the port flank of the Raider.
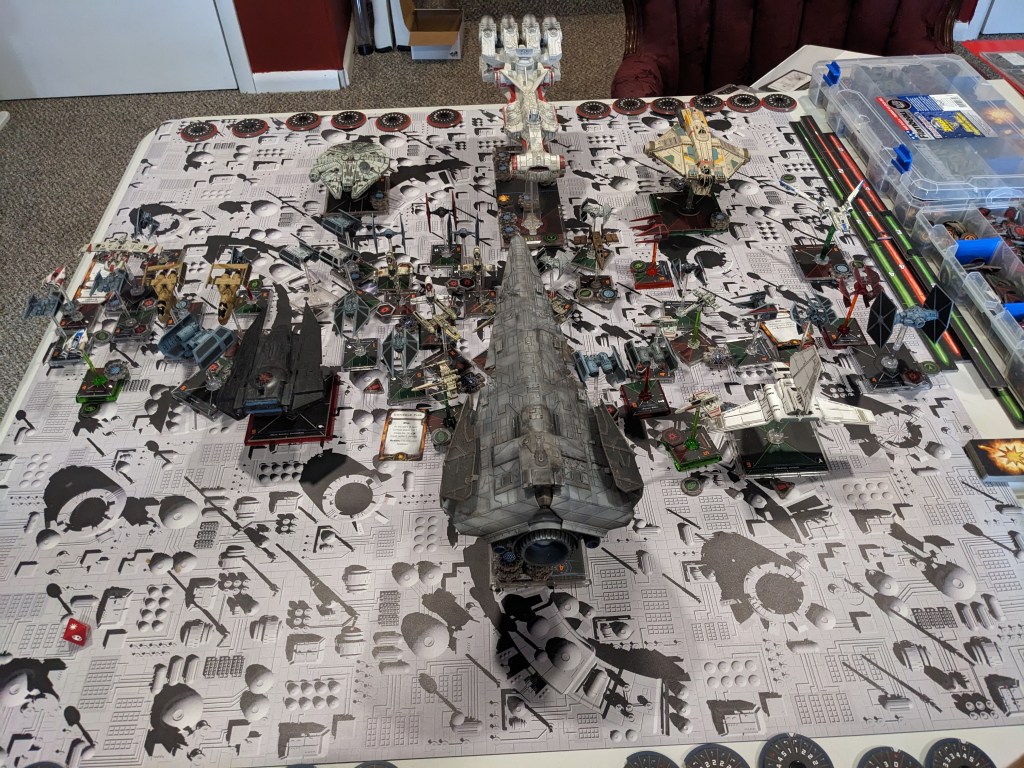
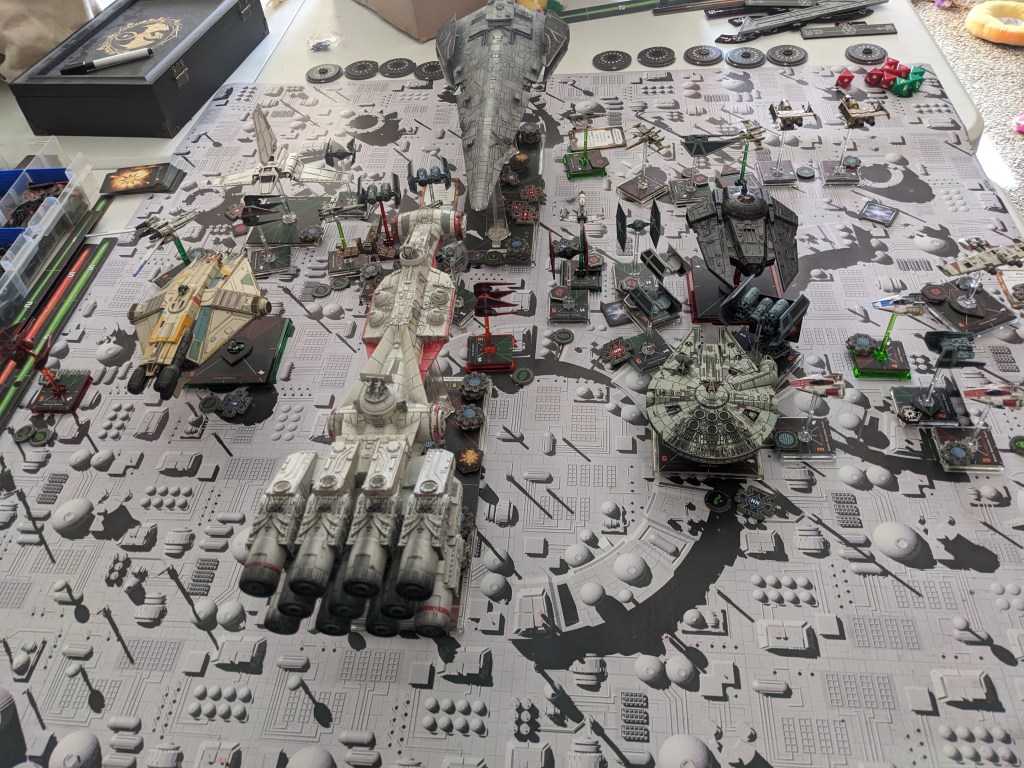
Turn 2 Movement got much more complicated. In addition to weaving through friendly lines, ships now had to predict enemy ship movements and failures!
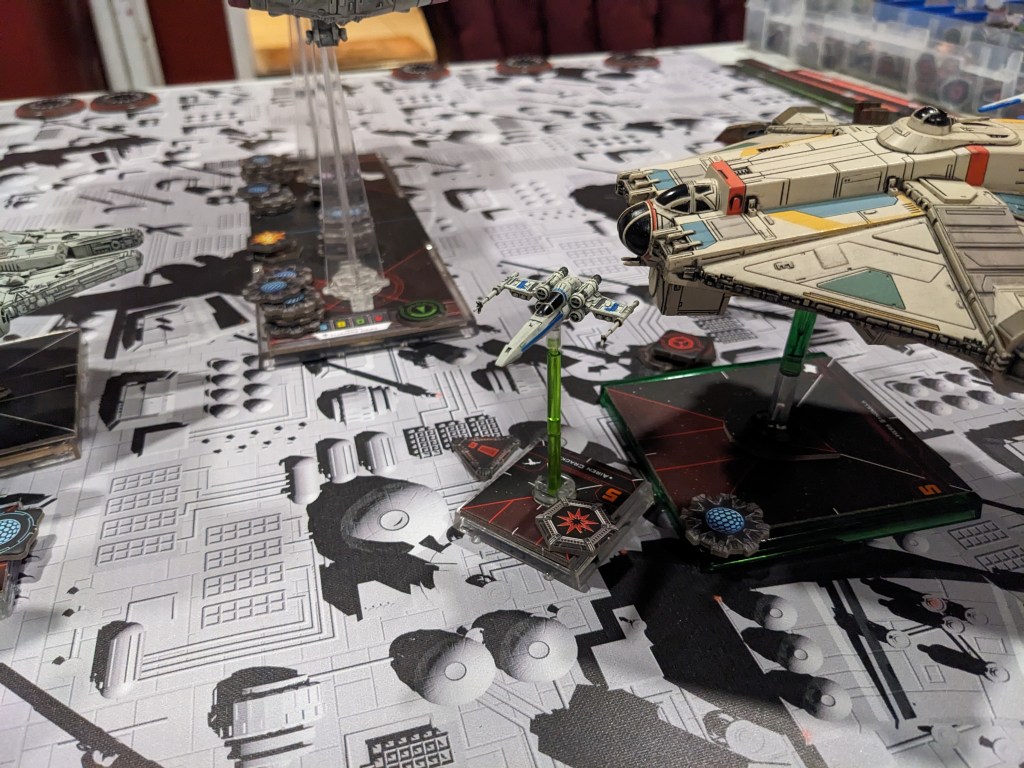
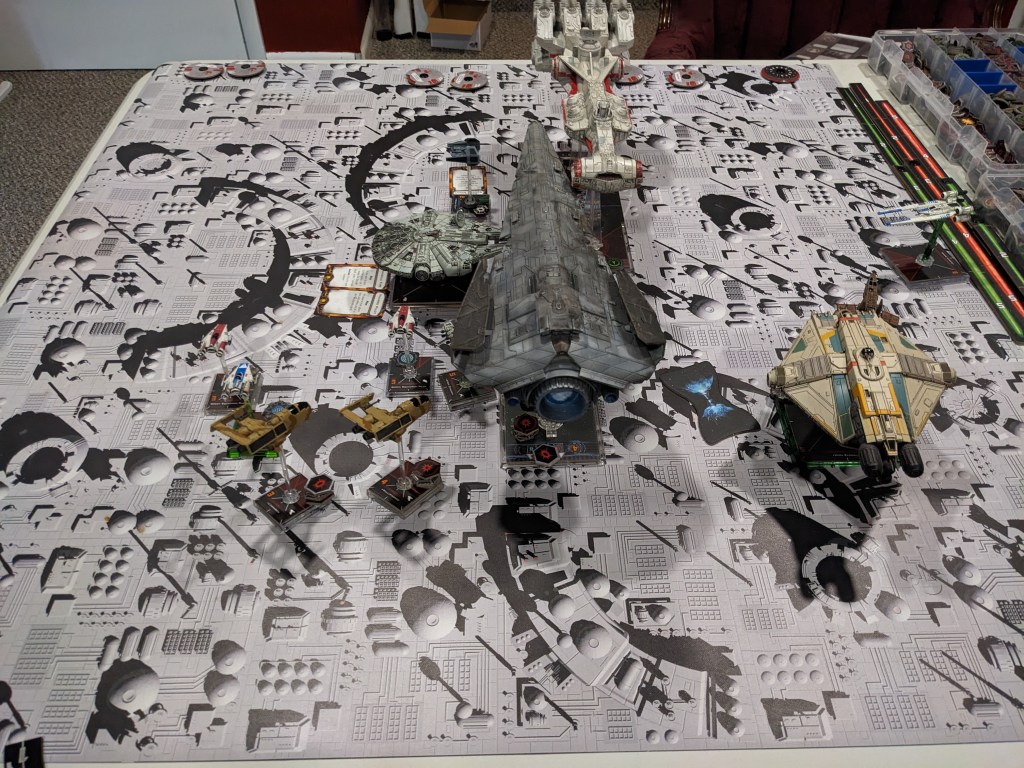
Rebels moved their gunboats up a bit slower now, providing heavy fire against the swarm bearing down on them! X Wings pulled some G’s and began a torpedo attack run on the Raider! E wings followed suit, doing their best to weave through the TIE swarms. For support, the Z-95s did their best to join as well.
On the right of the CR-90, The Y Wings began consolidating in as the B wings trudged forwards at best speed.
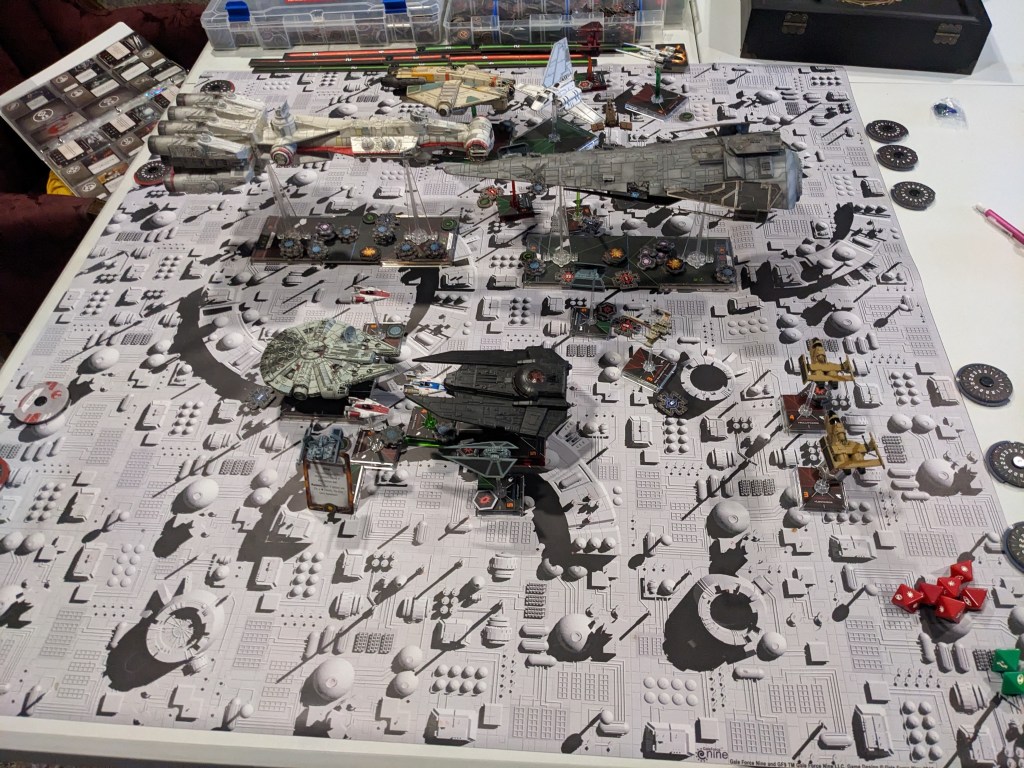
In turn the Imperials launched a brutal series of fast come about maneuvers! Second wave slowed down as much as possible, leaving gaps for the rebels to fall into, completely surrounding their heavier crafts!
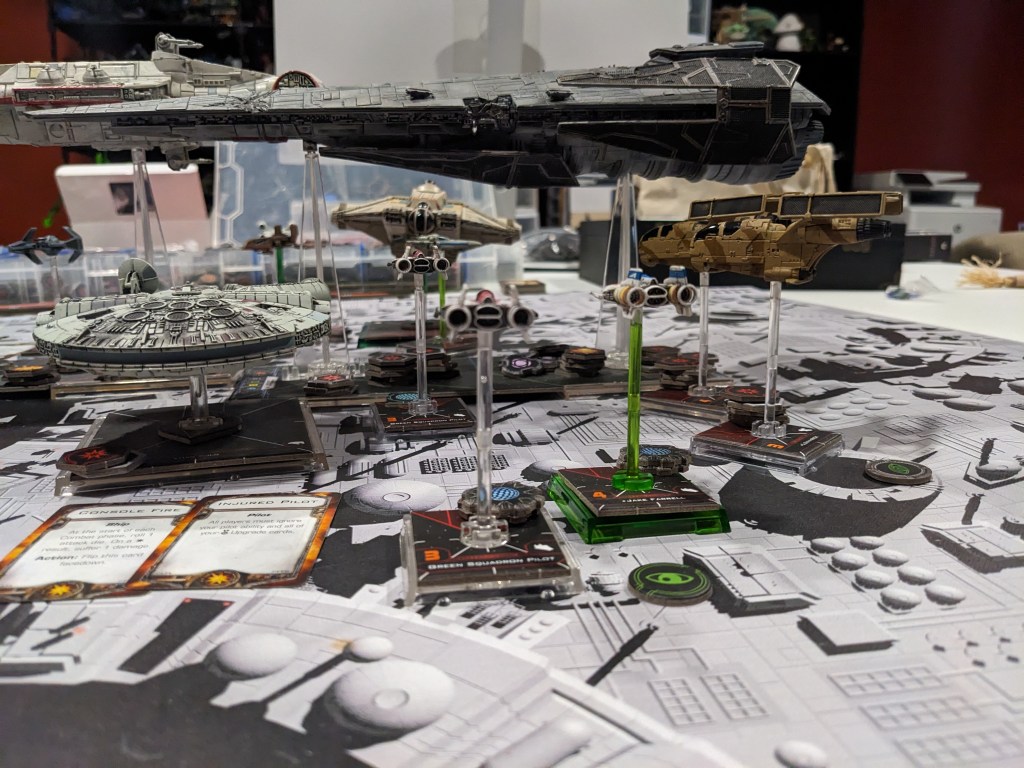
The attack phase was far more punishing this time, and not just because there was a TIE Punisher!
The short version is a bazillion torpedoes slammed into the aft and fore section of the Raider. The Aft was crippled, killing its ability to perform multiple actions like coordination for future turns. It had been relying on those to keep the Bombers locked onto the CR-90 despite the extreme pod racing going on. The fore section kept functioning! Botched rocket attacks proved the superiority of torpedoes for the task of delivering reliable critical hits.
The rebels managed to hammer away at the Strikers, taking one down along with two aggressors, a phantom, a Bomber, an Inquisitor, and a Defender.

In turn, the Imperials managed to get the rebels divided, making it hard for their synergy abilities to work well together. The managed to beat the tar out of the B wing squadron and destroy and E wing with 2 Z-95s and 2 Y Wings. A big part of this was quality of rolls and the large quantity of Rebel shields, most of which were knocked out this round.
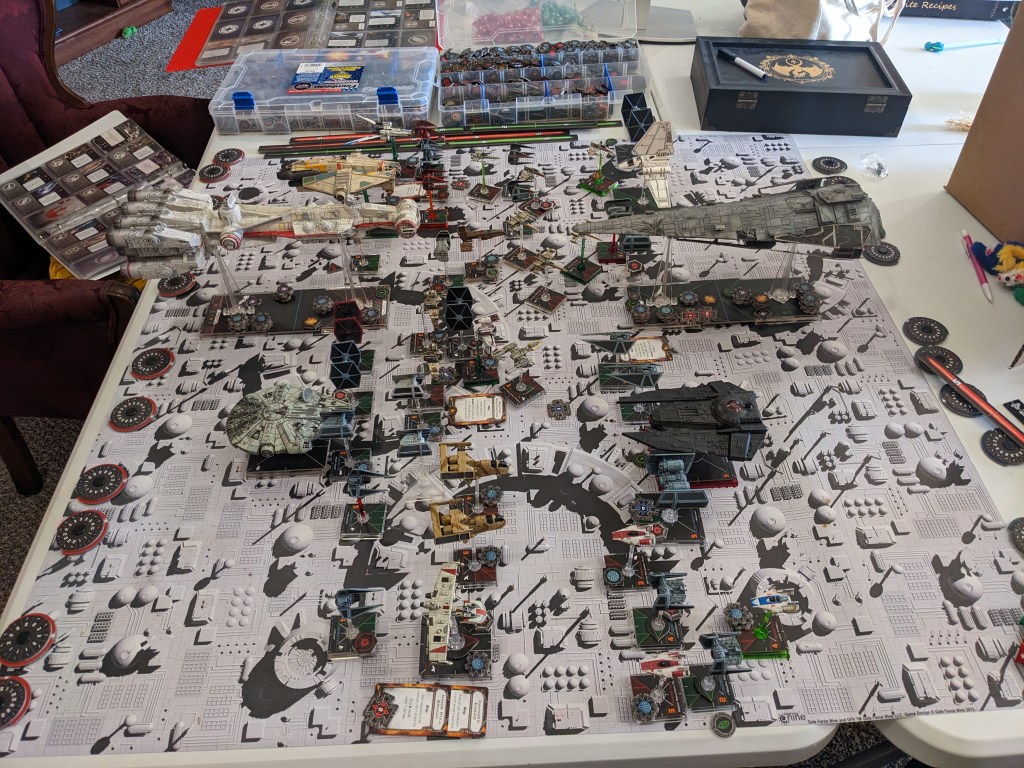
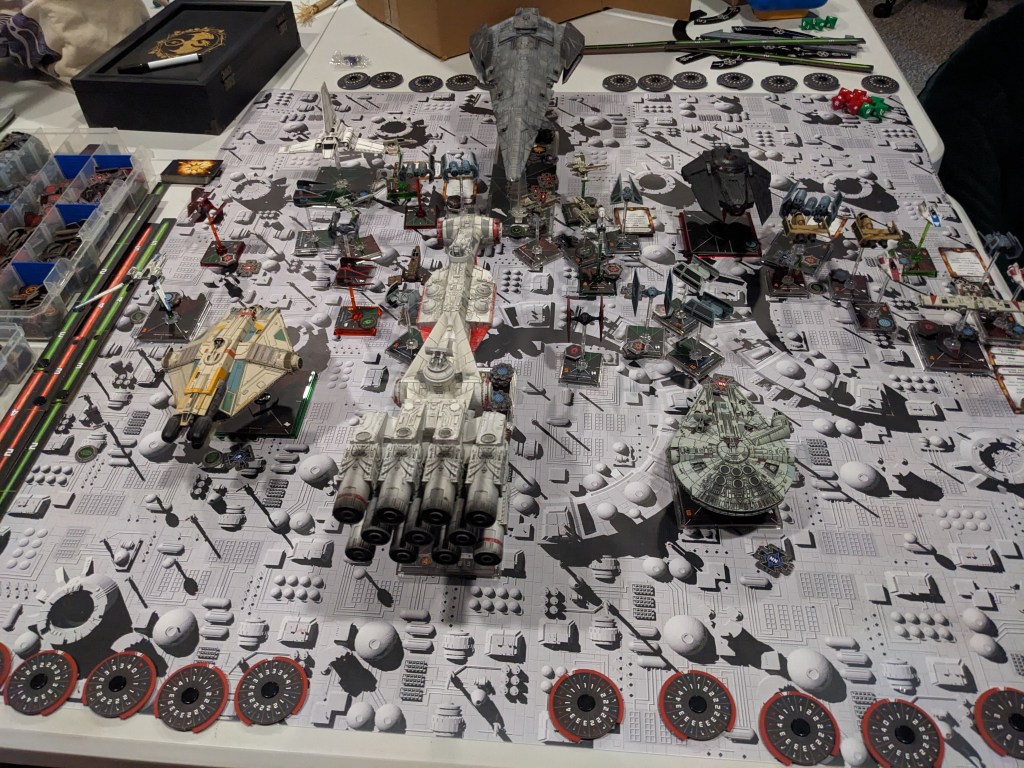
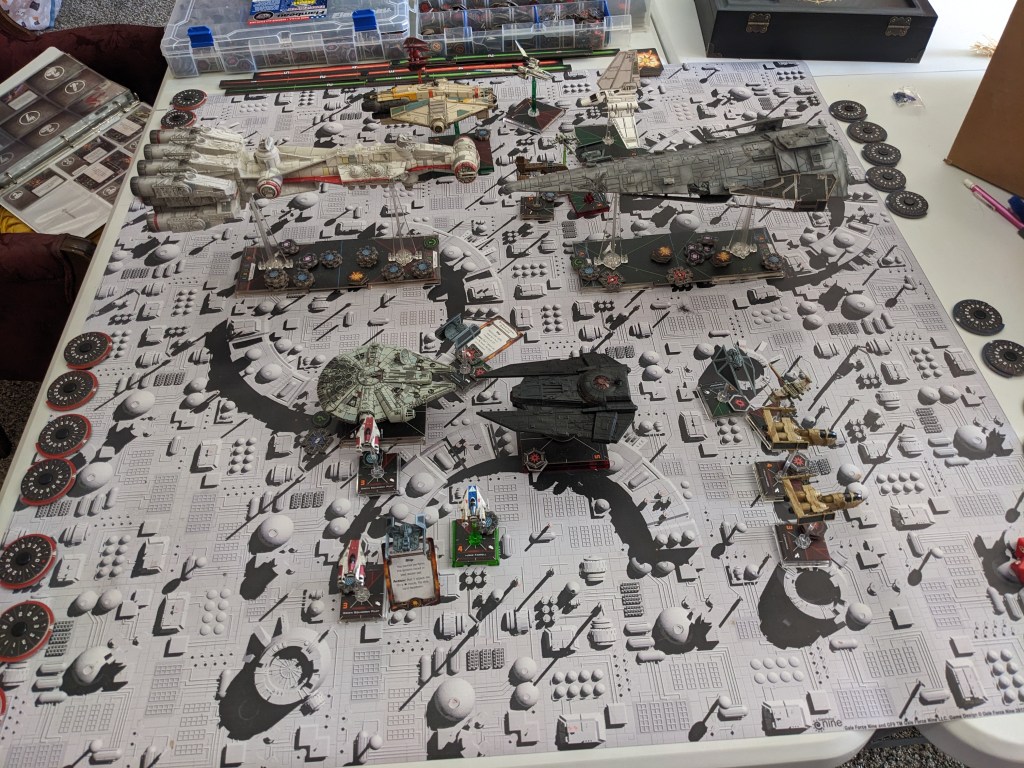
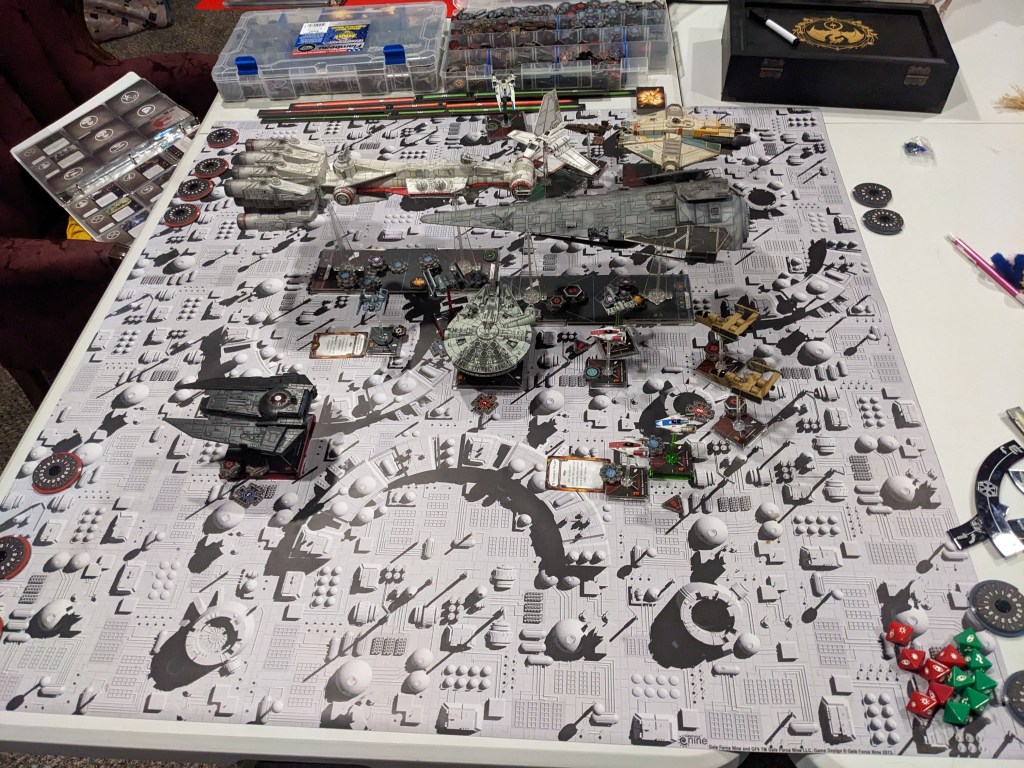
Movement of Turn 3 saw a general break down of coordination. Like all plans and strategy, no plan survives contact with the enemy, even if its yourself!
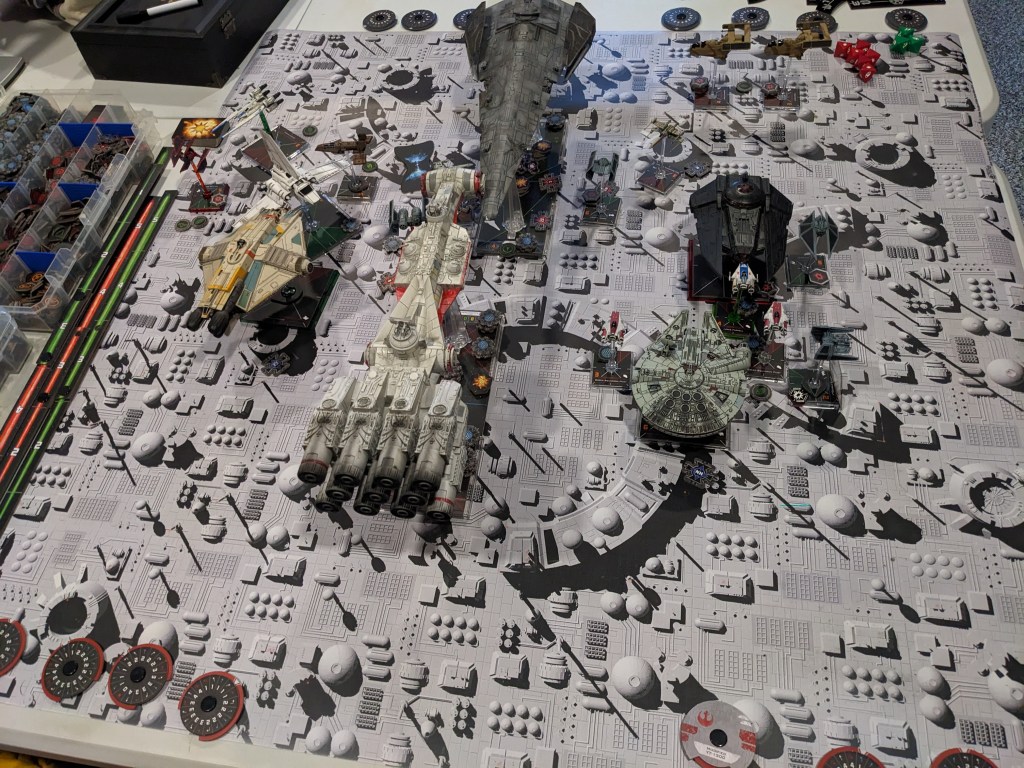
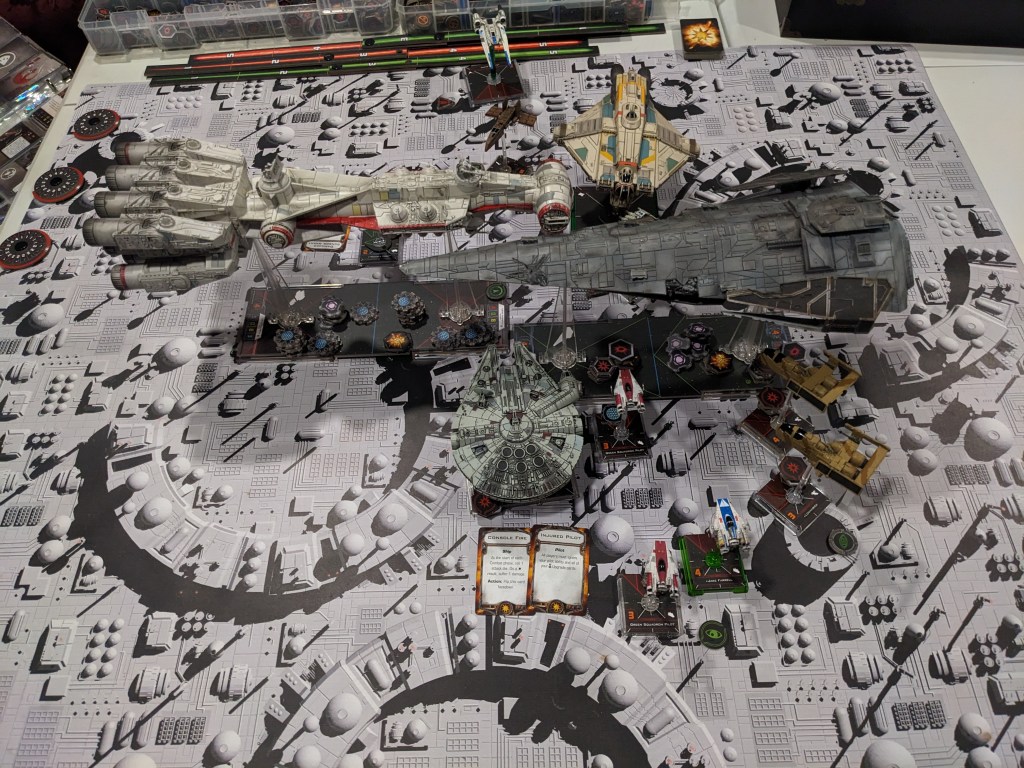
Rebels limped along their bomber craft, doing their best to close to range with the Raider. Others that used torpedoes previously were now to close and attempting to pull out of the way to make room for the slower craft bearing down on the target. Their heavy gunboats now began to shine as they prepared for mop up duty.
Imperial ships prepared to finish the bombers! Moving in nice and slow, they lazily followed behind with their first wave, closing the gap behind the ponderous rebels. The second wave close to point blank range as well on their fronts, maximizing the potential fire power! The TIE Bombers got completely fouled up and could not acquire target locks on their own again. The Raider sacrificed what power it had to provide that for them. The CR-90 had to lose its fore section with its intense fire power!
Both Epic ships unleashed powerful barrages on the opposing force! The CR-90 hit all ships at range 5 while the Raider hit all ships within range 3. The raider made up for its lack of rolls this turn, rolling well above average! Combined with the excellent Imperial maneuvers earlier, a ton of rebels were destroyed before they could fire!

The rebels claimed the second Defender, another Inquisitor, another TIE/LN, 2 phantoms, and another Striker. More importantly, Ghost nailed the front end of the raider with a torpedo, but botched its roll and didn’t cause any critical hits, even when spending its target lock to reroll! None of their bombers lived long enough to take the shot either!
The Imperials laid waste to the rebels, taking out the Y Wing, 2 B Wings, another E Wing, and an X wing. The K wing was completely crippled by this point as well.

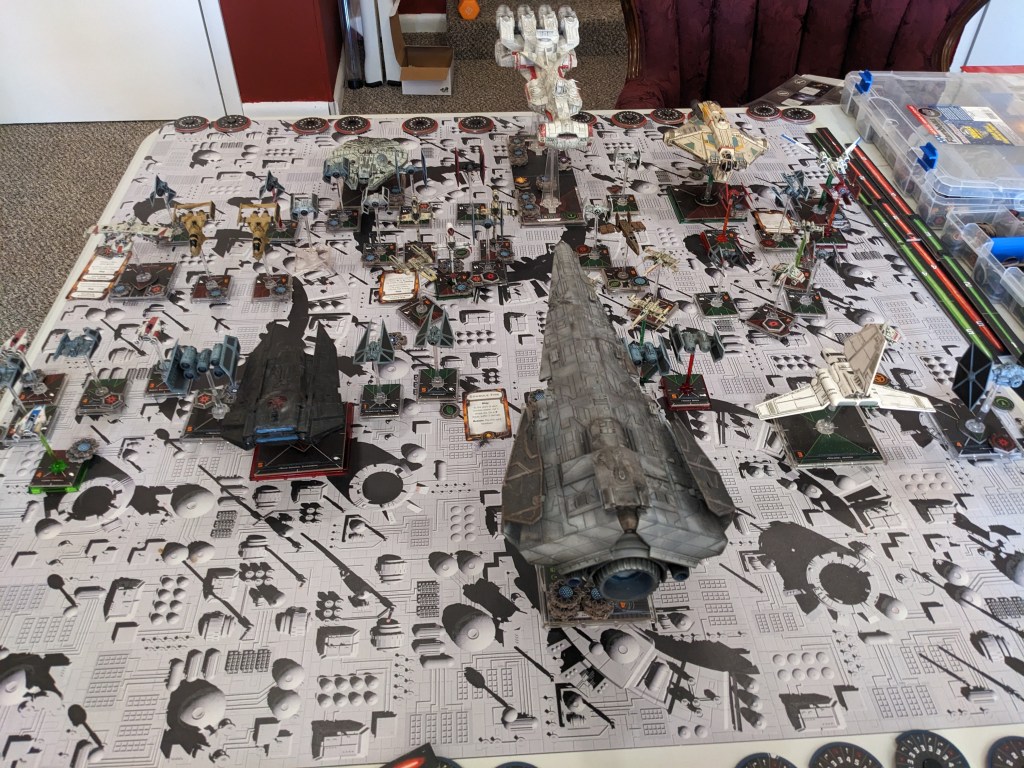
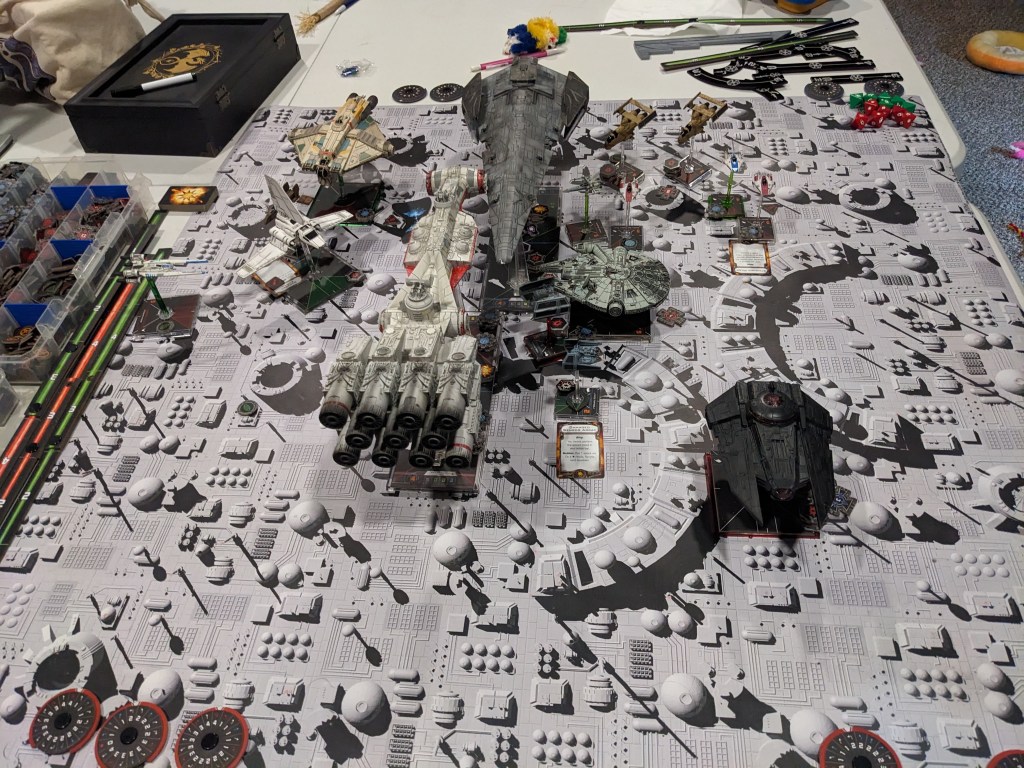
Turn 4 went from some what coherent pursuits to a every man for himself!
Rebels were scrambling to get their last heavy fighters away from the Raider and out of the cross fire. The A wings by now had spent all of their Proton Rockets and were doing their best to keep the flank locked down by getting in the way and throwing blaster fire at anything that moved. X Wings and the E wing flipped around to get fire on their pursuers.
Imperials were in similar straights. The TIE Interceptor squadron got divided into three different directions and was now all over the place. Darth Vader, his TIE Advance escort, the Decimator, and the remaining TIE/LNs found themselves sitting on a Proton Bomb.

The barrage was particularly painful for both sides. Shields were more or less nonexistent by this point.
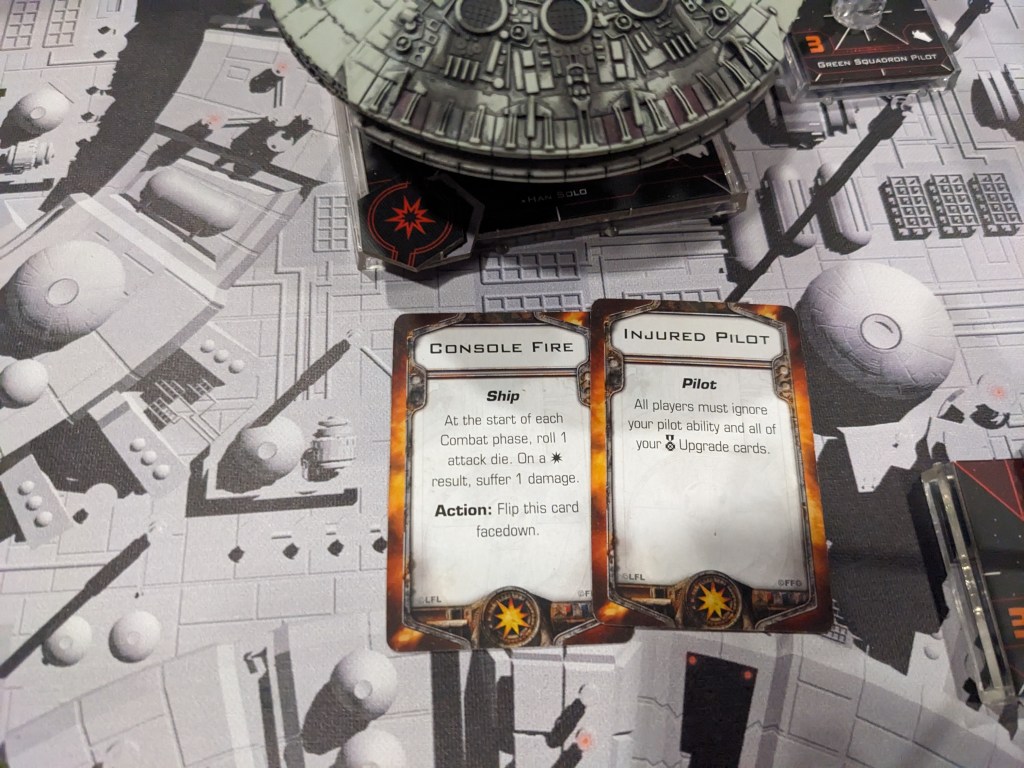
Rebels had broth gunships beat up, but they pulled through the fight and began strafing the Raider to finish off its aft section. The last E Wing was shot down as well as the second X Wing. Ghost pulled off the second torpedo shot and crippled the Raider’s bow, eliminating most of its fire power! Han Solo claimed his second TIE Advanced kill. In addition, the Punisher was shot down. It had been hampered the entire game (intentionally by the rebels) and never got a chance to shine.
Imperials had their TIE Bombers tied up yet again, but managed to fire off a pair of very accurate missiles. Rebels invoked their one and only ignore rule for being outnumbered by 300 points, saving the CR-90 in a pivotal moment!
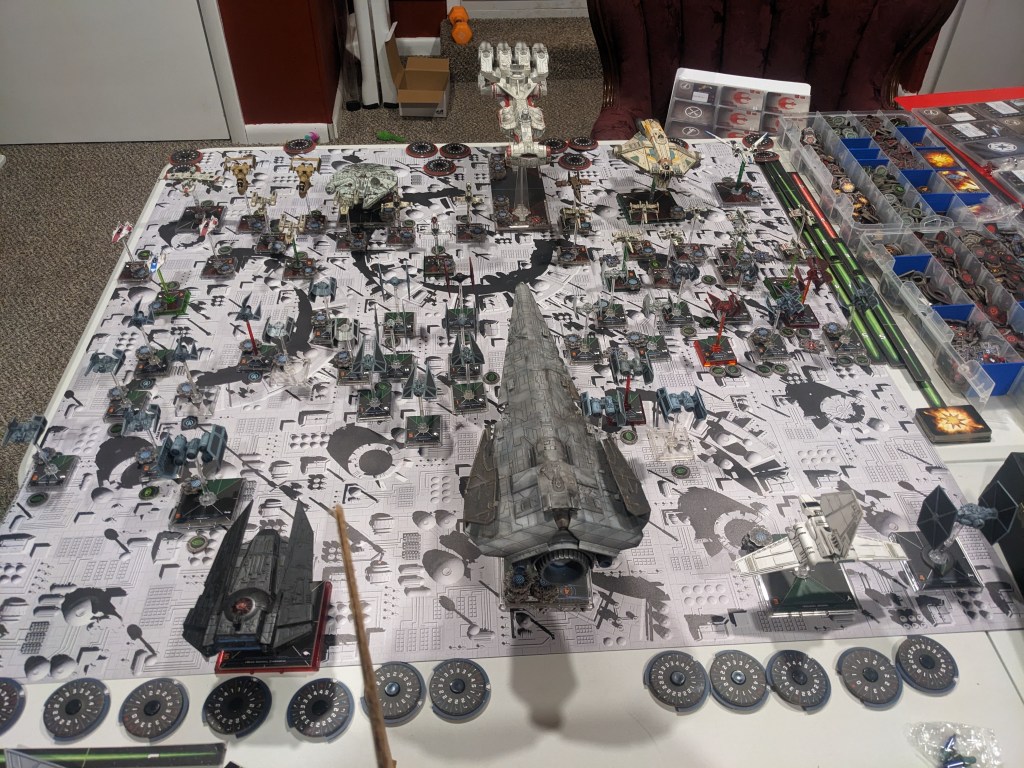
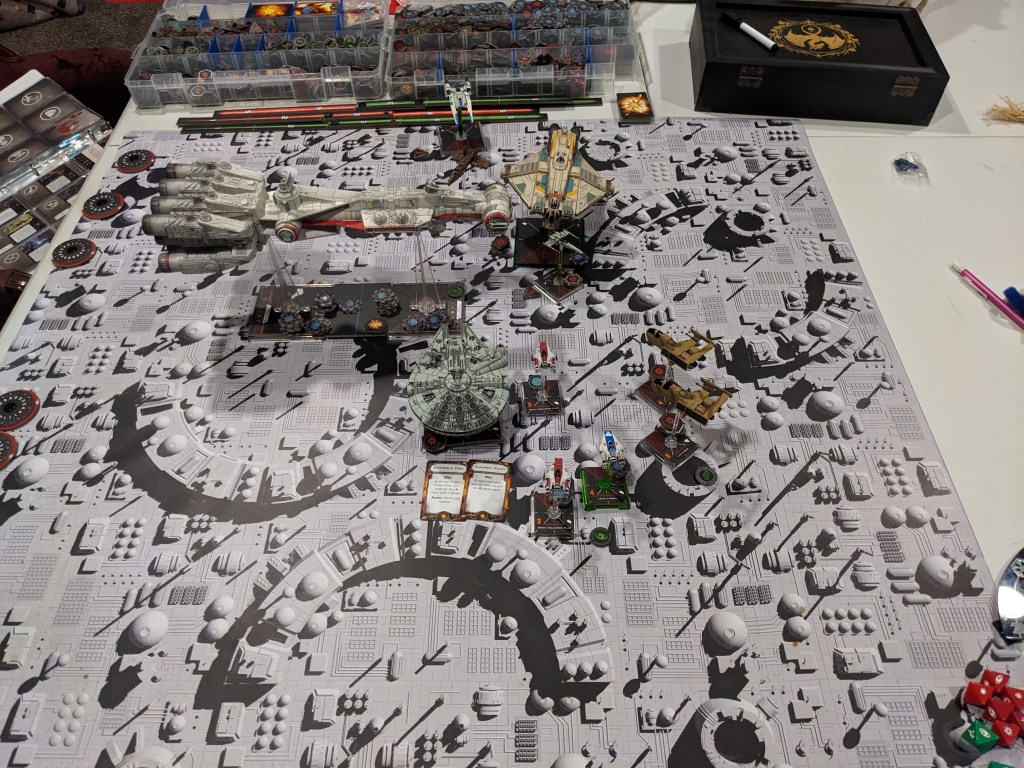
Turn 5 became a more clear image of the way the battle was going to go. With both Raider sections crippled, it was a sitting target while the CR-90 had the chance to soak the battlefield with turbolasers at random.
Gunships swung too their port and bared down on the Raider. A Wings swung around to hamper and hinder the Decimator by any means necessary. Lastly, the left flank of the CR-90 became a disaster of bumping ships as they attempted to get distance from each other.
Imperials were in damage control mode. The Bomber dropped a Connor net and prepared to Proton Bomb next round if it survived. The Defender tried to outmaneuver the larger ships, but it was dealing with a pesky U wing that was not having any of his shenanigans. Vader was running with Han Solo on his tail. The Target Lock did not bode well for him.

The shooting was quick and decisive, mostly leaving big ships to play.
Han Solo claimed his third TIE Advance kill, taking Darth Vader out of the game! The Decimator took a fair beating as did the aft of the Raider. The rebels also destroyed the last Defender and Bomber. Somehow, the last Aggressor was still unscathed by this point despite having been shot at by 9 different attacks AFTER his squadron was destroyed earlier in the game! All TIE Interceptors were also shot down.
Lacking the fire power to do much, the Imperials kept chipping away at the large hull point ships that remained. Both gunships were down to one each!

Turn 6 saw the Epic ships have a collision and all smaller ships scatter to get better angles on their targets.
Rebels were seeking a final volley on the Raider, Decimator, and Aggressor with one fell swoop!
Imperials were trying to eliminate as much fire power as possible to buy time for the inevitable. However, it is a dice game and anything can go!
Surprisingly, the Raider held on with its fore section having a mere 1 hull point left! The Aggressor continued to trundle along with its initial 2 damage from before. It took a variety of shots and survived without further damage yet again!

Turn 7 was the final game round, but it surprisingly was not on Turn 6! Ships moved in for the kill.
The barrage of lasers was intense and highly unnecessary, but happened anyways.
Rebels win the game! Despite being 300 points behind, the general use of Torpedo weapons and the key ignore one roll saved the day! Normally, I would have brought my other 10 or so TIE Bombers and Punishers, but this was a proof of concept and I wanted variety. I also wanted to see the effectiveness of fast fighter screens and collapsing battle lines.
Han Solo ended the game with his cockpit shot up twice! Ares survived the game, and in fact did about 25% of the damage to the Raider by himself! Only the A wings survived in good condition.