
This was a fun project that I was ABSOLUTELY certain was going to look like garbage. However, I was pleasantly surprised! I didn’t take pictures throughout on this one, but I will the next time I do one and update this page. Small details and matching paint colors can be a frustrating process, and if you are like me that daunting prospect can prevent you from getting the motivation to finish painting your collection.
Now a lot of professional painters always say “This is really easy and anyone can do it!” But low and behold, it is not for some of us, and we end up frustrated or feeling like a failure. I will be the first to admit I’m not a professional painter, but I think this came out pretty well and with a few basic techniques you too can have a decent looking Falcon, even if you do not do all of the detail work I did.
For those of you who don’t know (so all of you), I have a slight lazy eye. This can make for a difficult time doing tiny up close detail work with a brush because it’s hard to tell when I’m about to leave paint. With time and practice it’s doable to overcome (or repaint until you get it). These deep cut models are rather forgiving so don’t worry if it takes a few coats!
I’m going to be demonstrating this with Games Workshop paints. This is not a sponsorship or anything like that. I just really enjoy their paints and will be explaining how I used the different mixtures. You do not have to have the full range of colors I used here, but this is what was used on mine. You are going to want a smaller normal sized brush and a tiny detail brush. I will let you know when to break out the tiniest brush you have.

First trick is to capture the original color of the Falcon. Due to the original film color, original props, Lego kits, model kits, X-Wing Miniatures, video games, comics, etc, there are actually quite a few “correct” shades you can go with. I decided to aim for the original A New Hope, and if I ended off a bit I would still be in the realm of canon.
I started with Layer Ulthuan Grey. Layers are pretty general use paints in GW’s line. Being a deep cut model, it is forgiving if you want to use a Base paint. But A) Ulthuan Grey is a nice light grey that is easier to modify and B) I anticipated needing to try multiple layers to get it right. Lucky for you, you won’t have too!
This came out a bit too white looking, and the deep cuts look terrible as a solid light color. The falcon looks very rusty and grimy. It’s a worn-out ship and I wanted to capture that look. I then did a layer of Shade Agrax Earthshade. Shades, also known as Washes, are very watery paints designed to flow into the cracks and crevices of a model, pooling at low points to help create better defined lines and shadowing without building up layer upon layer of paint. There is a reason it’s called liquid talent in the painting community.
But wait you are saying. It’s all brown now! That’s okay and actually planned. We made sure the whole thing, particularly the edges and cuts are now dirtier than Twi’lek dancer. What we are going to do next is a technique called dry brushing. Lightly dip your paintbrush into the Ulthuan Grey again. Then give it several quick swipes onto a cloth or paper towel. All of the kool kids on the internet do their thumb, but I prefer to use a more elegant tool from a more civilized age. Now, lightly swipe it on the Falcon. Mostly likely no paint will transfer. This is normal. Dip it again, wipe the excess, quick swipes on the Falcon. Repeat until enough color has saturated the brush to transfer. Then continue the process of building it up until you get the desired color. The goal is to have most of the brown hidden, but in the nooks and crannies some light brown should still be present.
Next I decided to do the various mix matched panels. For some reason, in Star Wars paint is expensive so ships in the rebel fleet frequently are mixed and matched. The model doesn’t have the detail to show you the individual panels, so if you choose to do this just eyeball it. Credit to whoever deserves credit.

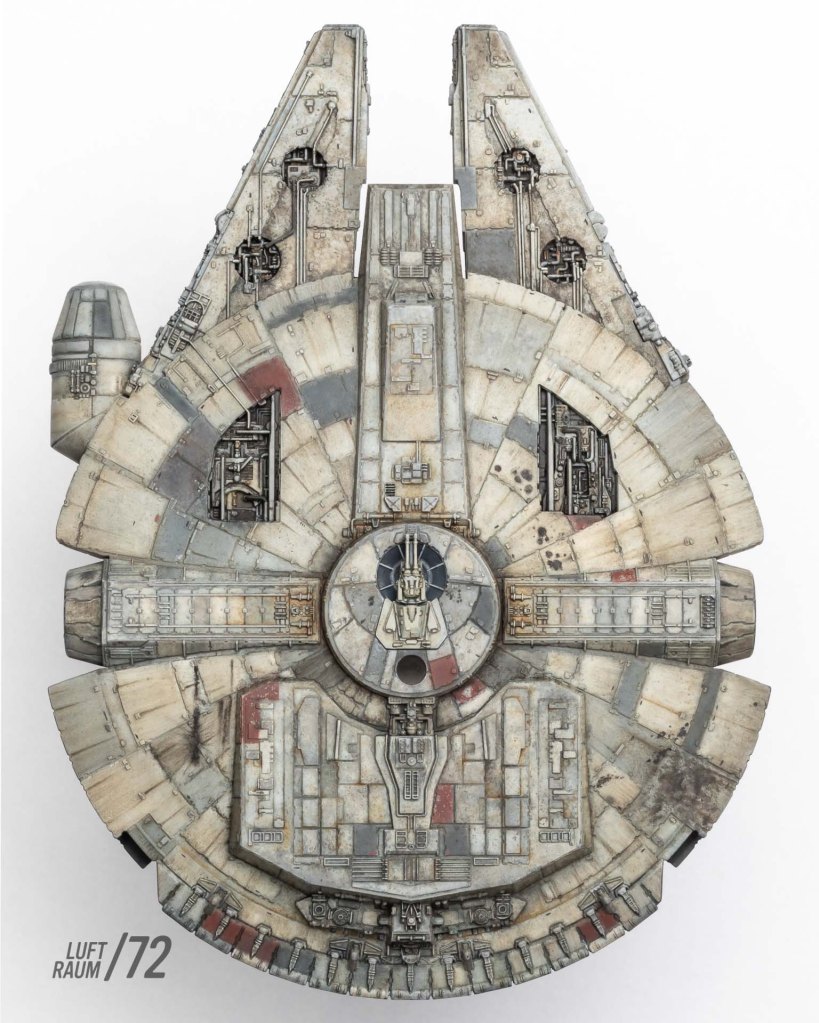
Pull out your smallest detail brush until stated otherwise. For this I used Base Averland Sunset, Base Mephiston Red, and Dry Stormfang (for the greyish and greyish blue/green panels). Base paints are thicker and heavier. Normally they are terrible for detail work, but when it comes to tiny dots, splotches, or panels they are fantastic. You only ever need one layer and don’t have to try getting several matching shaped layers in the same spot. The Dry paint is designed for Dry Brushing with less wiping. But the color was perfect, and I did not have another option in my collection. I dipped my brush in water first to help it apply easier. This took some patience and mild correction afterwards.
For the access points on the rear of the Falcon, I carefully filled them in with Layer Dawnstone. If you get any on the lips of the ports just correct with Ulthuan Grey, like any other part of the model.
The windows took a steady hand and some patience. I used Base Abaddon Black. I love this paint because its heavy and absolutely blackens whatever you put it on. For the most part this model will do the work for you. The horizontal windows are cut VERY deeply. Hold the Falcon so you are looking at the cockpit head on. Place the tip of the brush in the furthest part of the triangle windows and brush towards you. The deep cut edges will pull the paint off and fill the point nicely! If excess comes off, just quickly wipe it off with a finger or cloth so it leaves the frame the originally color.
Once this is done, there is a dot in the front of the cockpit. Paint the circle black as well. Lastly, this model doesn’t have all of the detail, but you can choose to paint the smaller windows connecting the triangles to the circle. Do so by poking at it to get the shape you want.
Almost done! Still using your tiny brush, use Shade Nuln Oil. Nuln Oil is the lifeblood of Warhammer painting. Mostly because it is awesome! Shades have a tendency to get denser and staining the lower the amount in the bottle. This is because it settles over time and the moisture slowly evaporates over time. Mine was practically new so it was almost too thin to use, but if it was concentrated it would be too heavy. Better safe than sorry, if you think it’s too concentrated dip your brush in water first for extra moisture. lightly swirl it around the access points in the rear and then streak them backwards.
If you need to, do so multiple times. The falcon is always really dirty there for whatever reason, so build it up until it’s about where you want it. It will change slightly as it dries, so give it a minute in between coats to make sure it’s not too heavy.
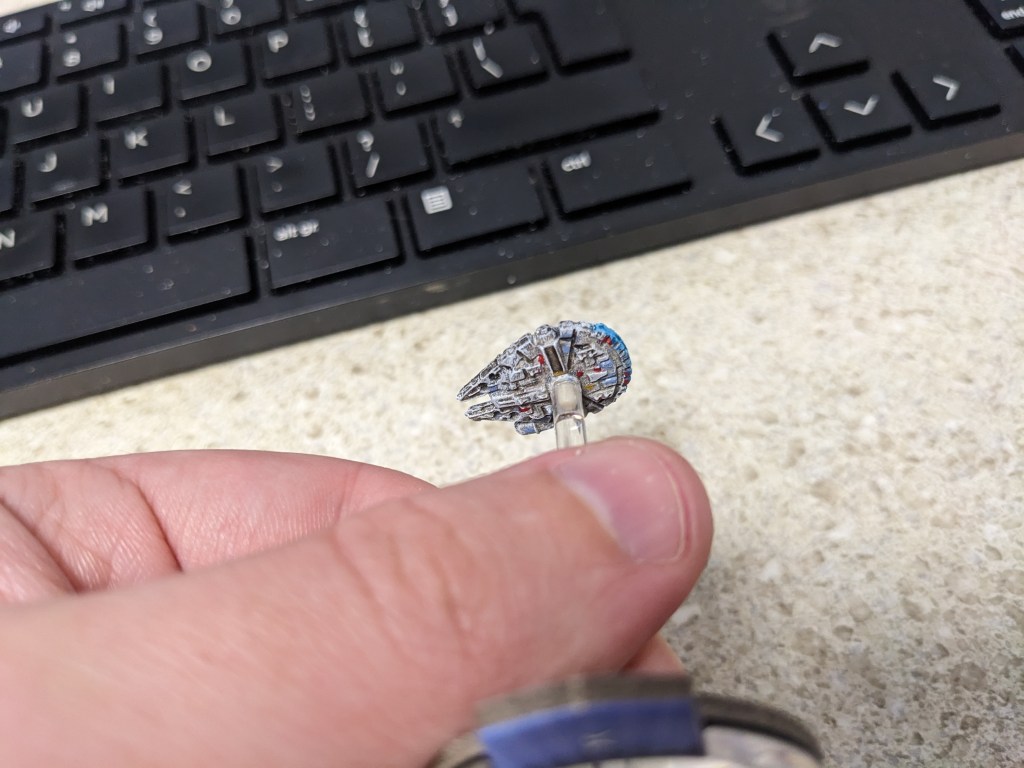
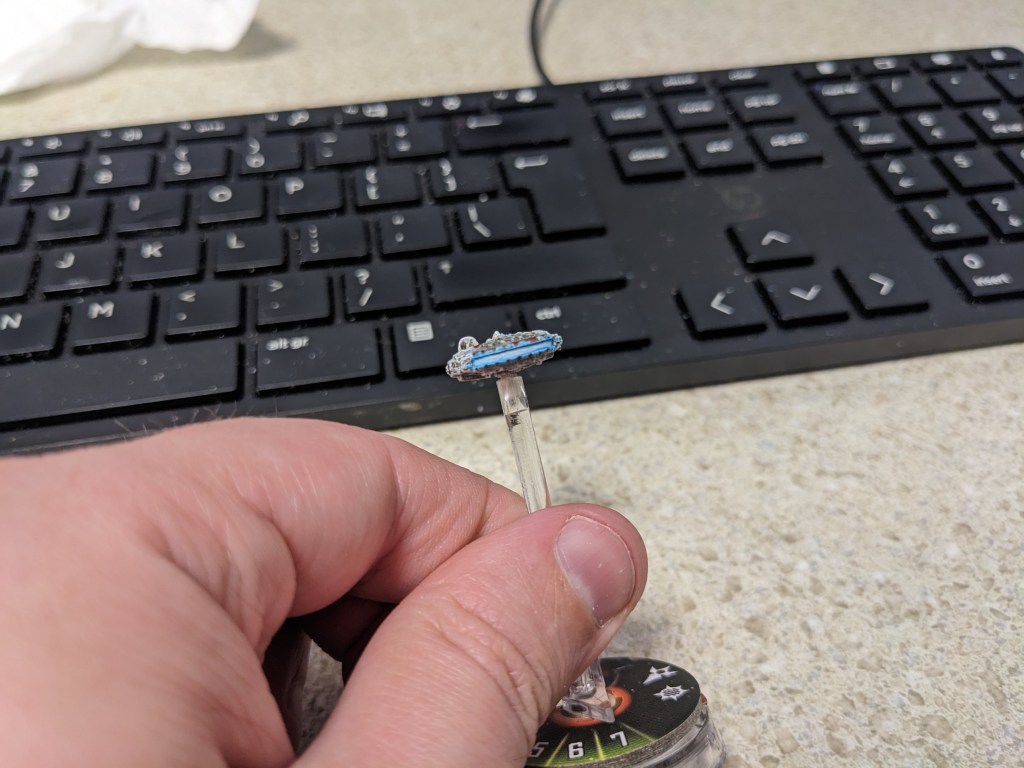
All that’s left is the engine! Now this is a really classic engine, with a near white hot center and bright blue peaking at the edges. Being the only lighting effect on this model, it’s going to pop really nicely!
There are a couple of ways to do engine flares. Nice and clean, contained within its housing or a bit messy with it just spilling out over the lips (imagine the flare you see in the movies, it would reach past the cowling and light up the edges). I did it slightly messy so the lips of the cowling were included, but this is optional.
I started with Layer Ahirman Blue and painted the engine gap, the flat parts of the cowling, and the lips. You always start with your darkest color first, but this engine color is so light blue we don’t want to get it too dark.
Next, I painted the bar with Layer Baharroth Blue allowing a bit of paint to touch the cowling as it extends away and then dry brushed it on the edge of the lips only to give it a nice highlight.
I then painted the bar only with Base Corax White. Whites are very hard to paint with, so I LOVE Corax. It’s a near light grey and looks more natural and is easy to apply over existing colors.
Lastly, I did coats of Contrast Pylar Glacier. Contrast paints are translucent paints that tint based on the colors beneath them. I have also found they blend colors underneath even better than Washes! I am currently on a quest to use Contrasts this way and have found it massively improves my work. It is also referred to as liquid talent. This paint shade is new to me and seemed quite thin, so I did a total of three coats, just enough to make the white look white hot blue instead. I also made sure to paint it over all blue colors to blend them.

Congratulations! You have a pristine looking Millenium Falcon to harass the Empire. Remember, it only has to look good from 3 feet away and no one can see the defects you see.
