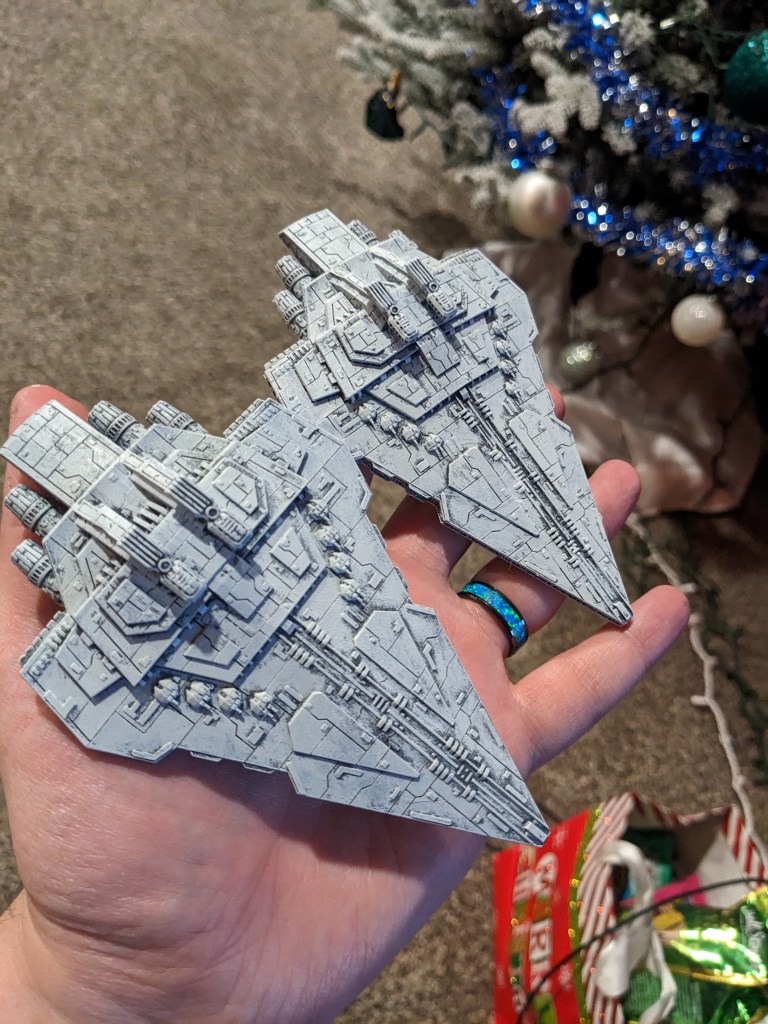
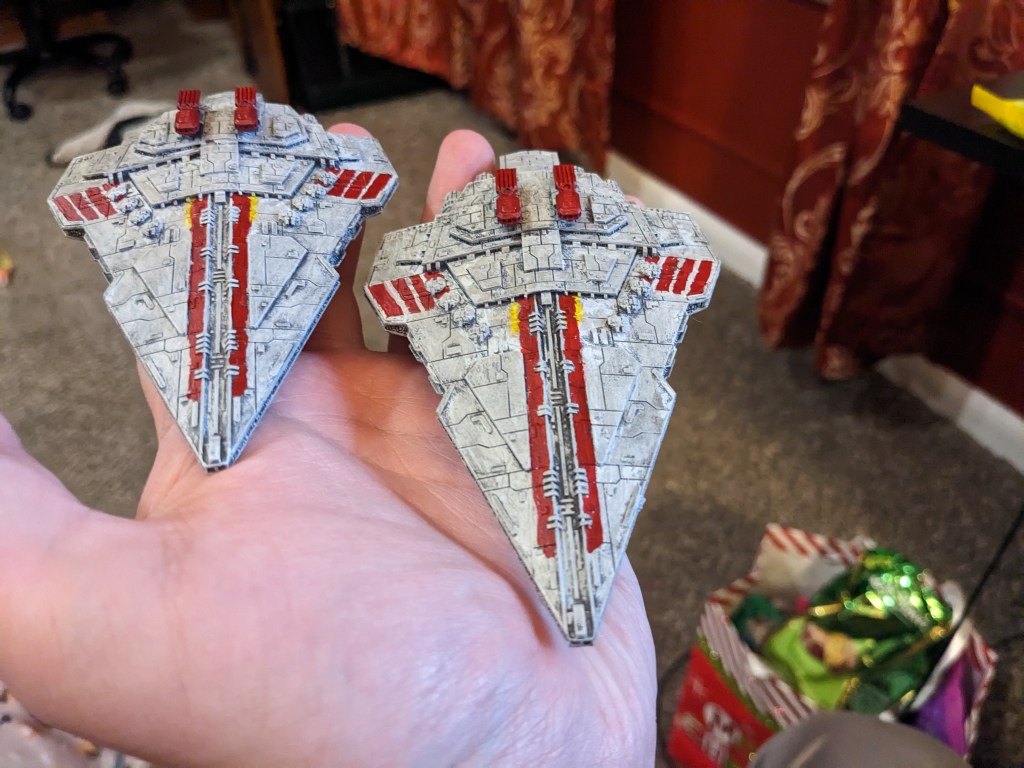
I hope the new year is starting off well for everyone! My first Armada paint jobs in 2026 has been the Rothana Destroyer, and I wanted to share the paint recipe and technique with you today to help encourage you get your 3d printed collection done. Sometimes its easier and less daunting to have a step by step guide out.
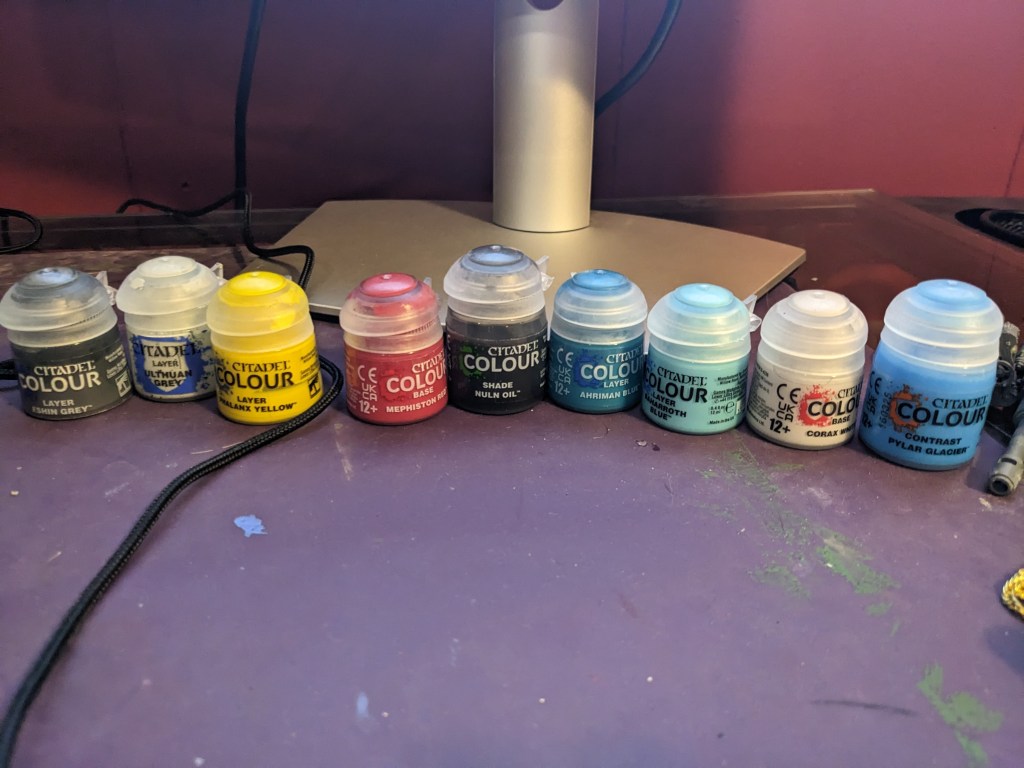
Today we will be using Games Workshop paints. This is not a promotion or sponsorship. I just like their paints. We will be using Layer Eshin Grey, Layer Ulthuan Grey, Layer Phalanx Yellow, Base Mephiston Red, Shade Nuln Oil, Layer Ahriman Blue, Layer Baharroth Blue, Base Corax White, and Contrast Pylar Glacier.
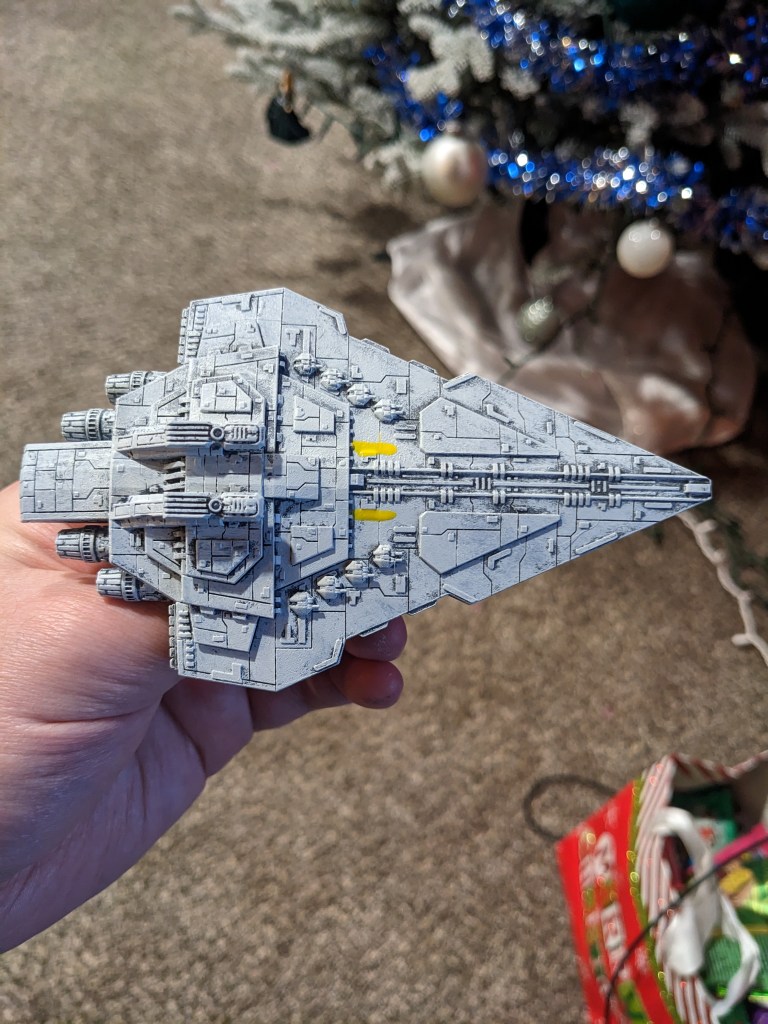
Starting out, lets do the base coat in Layer Eshin Grey. This excellent color provides a perfect shading in thin armor plating gaps without being too dark. Use a wide, semi stiff brush to get in all the nooks and crannies. BE CAREFUL with the gun barrels. They are delicate!

Next, heavily dry brush the entire ship in Layer Ulthuan Grey, which at this point I might as well start calling Star Wars Grey (but I really won’t). Someone came up with slap chopping, which is basically the same thing. Just get some paint on your brush (use another wide one), wipe the excess off, and slap drag it across the ship. Then dip, wipe, repeat until you get the density you want. I personally find a nice soft brush to do the best at skipping the plating gaps, but you may find it some what lacking around gun emplacements.
Notice I got it a big heavy on the engines. This is okay, it will correct itself later on.
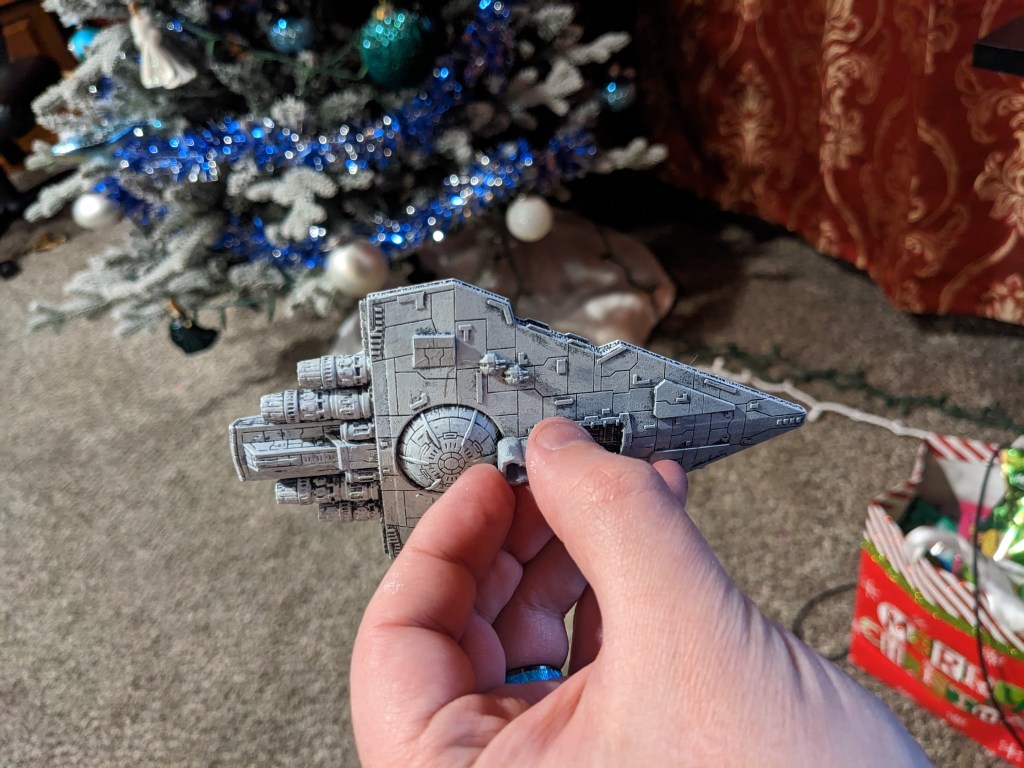
This model has a great looking hanger!
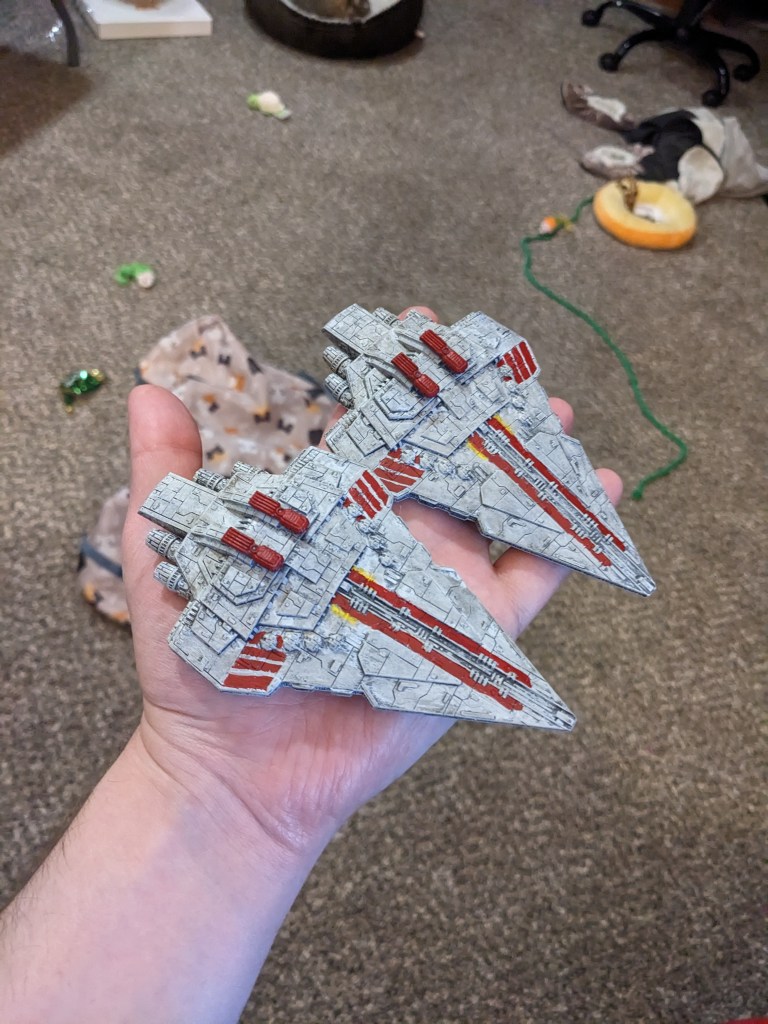
Next we are going to do the Rothana Battle Colors. There are several renditions of this, and even the ship shape changes depending on reference. This one I felt was the closest to what fit the model. We are going to use Layer Phalanx Yellow to paint two stripes on the upper hull. The actual stripes are incredibly thin, so don’t worry about exact placement. If your yellow is like mine, it randomly got super watery. Just do two coats with a minute in between each one. Its going to be bright yellow, but trust the process.
If you want to do an Imperial or Attack of the Clone Theme, skip the yellow and red steps.
Next we are going to use Base Mephiston Red and really get to work on making this ship stand out as a Republic one! Once again, this varies wildly! Three sources show the wing stripes completely different or the structure entirely reshaped!
I used the nifty brackets on the front as my angle and width. this was SOOO much easier than the Acclamator stripes because of that. Draw backwards to the armor plating line. In the scheme I chose, the fourth stripe hides underneath the two turrets. It can be hard to get in there, but if you get any on one of them its an easier cleanup afterwards with more Layer Ulthuan Grey.
The Bridges are done in red as well, but not the super structure its mounted too. Don’t forget underneath if you can, but no one will see if you can’t.
Lastly, we do the near hull length stripes. There are two raised paneling pieces I used for reference. Draw a taper from the long piece down to the nub, then straight back. TECHNICALLY, the stripe width should be just shy of the raised wedge paneling in the middle. But if you are like me and suck doing straight lines free hand, just go up to the boundary. It is MUCH easier this way! Overlap that yellow. You may find the yellow is still to wide. Fix it with more Layer Ulthuan Grey once Red is ready for cleanup as well.

After some cleanup, we are here! The sacred Shade Nuln Oil is now to be applied over the whole model lightly. Start on the bottom and water your brush as needed. Its nice and thin when new, but settles overtime, even with shaking before use. This will tune the yellow and grey to the correct colors while also helping details pop. The engines had a bit too much Ulthuan on them, so I did a second light coat after it dried a bit.
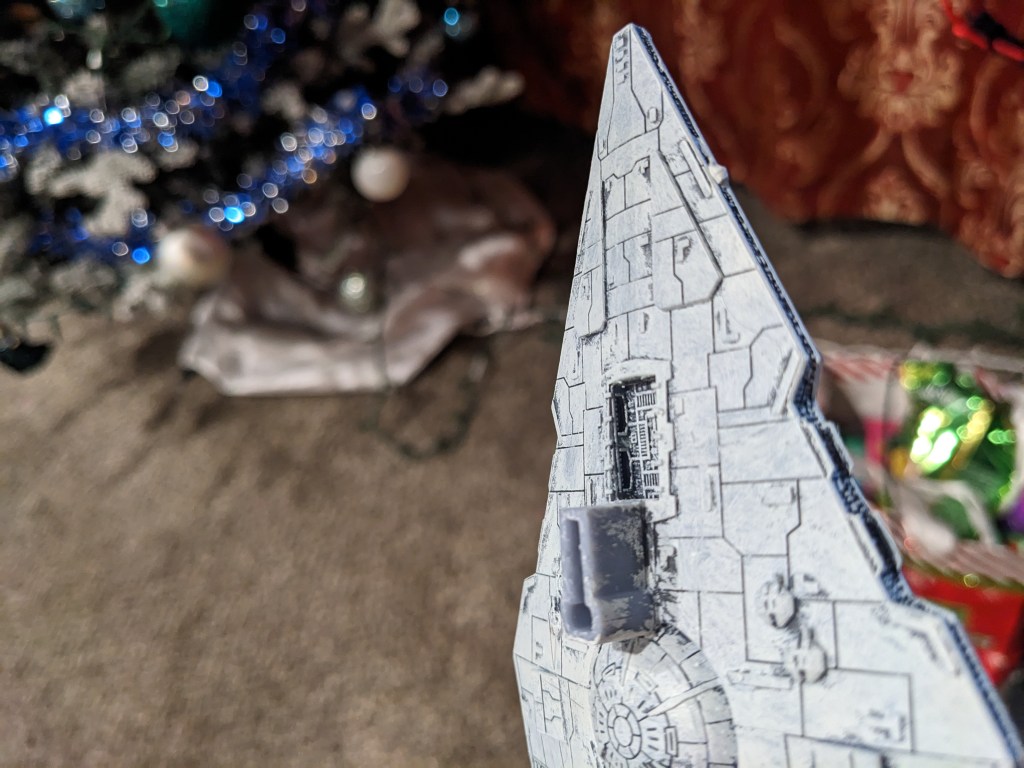
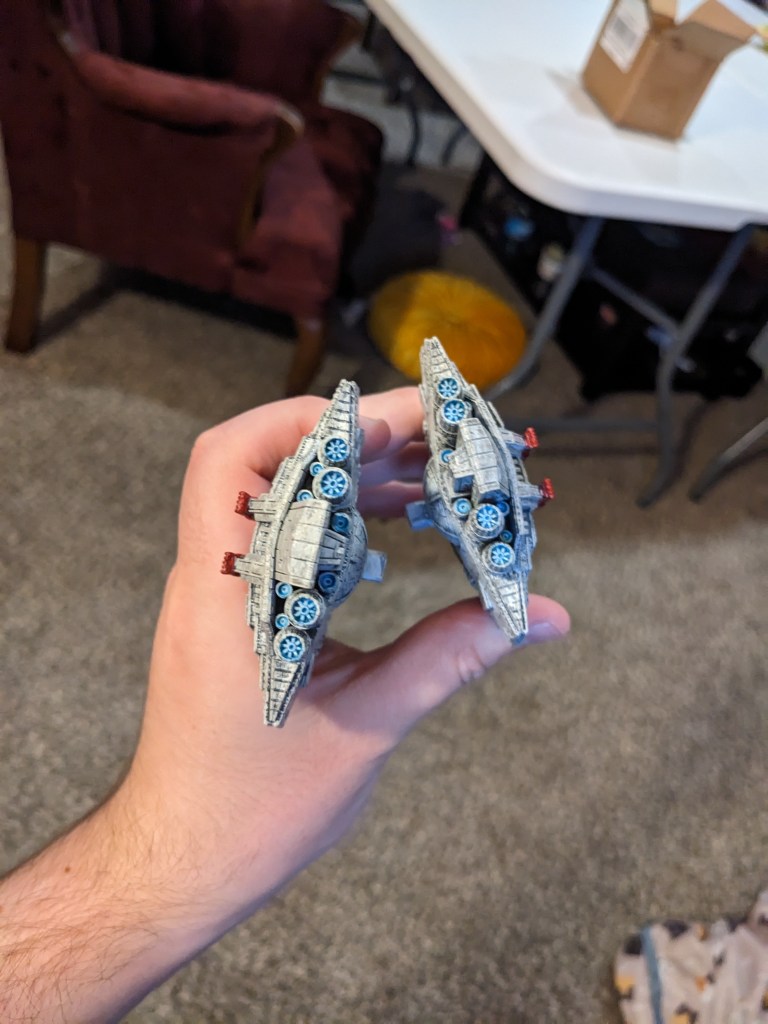
Its engine time! I wanted to try something slightly different then how I showed the Acclamator engines. Almost always there is more than one right way to do things, so I wanted to try it. Start by filling in the engine cavities and inner cowlings with Layer Ahriman Blue.

Next, fill in just the engines area with Layer Baharroth Blue. If you get any on the inner walls that’s okay.
Instead of doing the deeper recesses in white, this time I tried just brushing the engine structures and center of the smaller ones in Base Corax White. It does not need to be applied thickly.
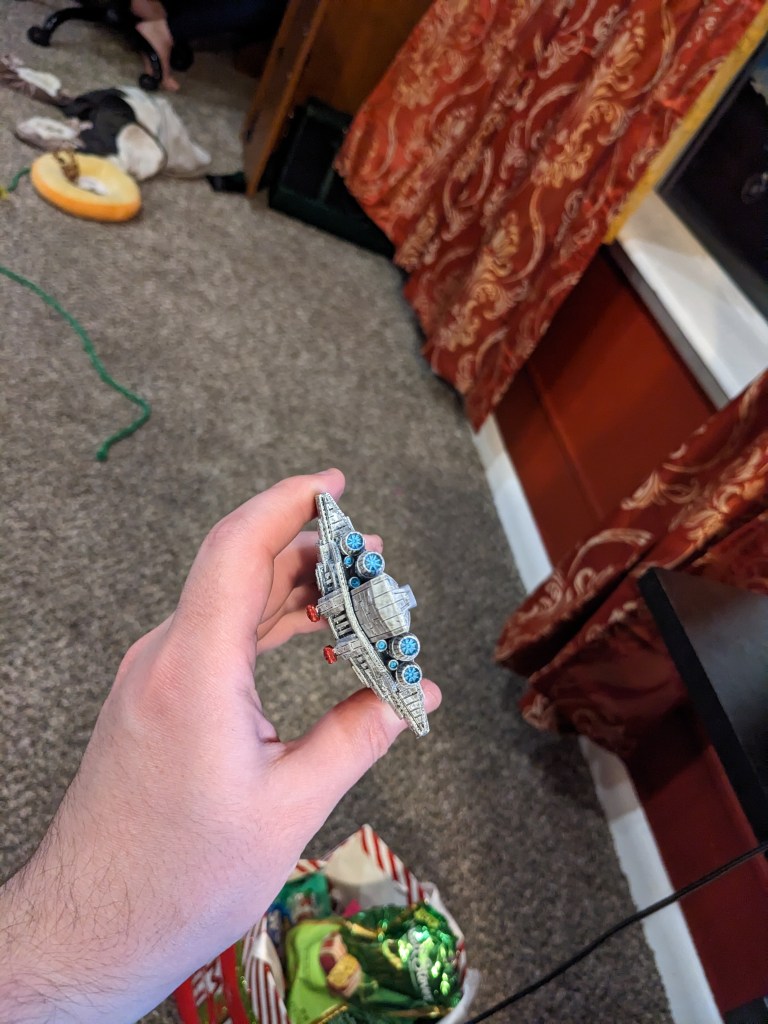
Lastly, apply a layer of Contrast Pylar Glacier, wait a couple of minutes, then do a second one.
Honestly, I can’t tell which style I like more. But I think they came out great! And they really pop in good lighting when on the table.
How did you do? I enjoy painting these, but don’t have space for them. If you are looking for them or others just let me know. I’m sure we can work something out.

Leave a comment